Purpose
[Last Updated 25 May 2021]
The Payment function is used to manually capture payments made from bank accounts.
Using the Payments function
There are four payment categories. The fields and the selections offered in drop down lists within fields are dependent on the payment category selected. The categories are described below.
-
Trust
For this payment type, only Trust or Trust Investment type bank accounts are available for selection and the payment may only be allocated to a matter.
-
Supplier
Supplier type payments can only be made from a Business type bank account and the supplier to whom the payment is being made is required to be selected from the Supplier list. Only invoices for the selected Supplier are available to allocate the payment.
-
G/L
For this payment type, any bank account can be selected. When a Business bank account is selected, the payment can be allocated to a Matter or to a general ledger account from the G/L Account list which has not been marked as a Trust G/L account. Where a Trust bank account from which to make the payment is selected the payment cannot be allocated to a Matter, only to Trust type G/L accounts which are available for selection form the G/L Account list.
-
Non-taxable
This payment type is used for payments that are not taxable such as when paying VAT or other taxes. Payments of this type do not appear on the Tax Report since they do not have any tax calculation.
When capturing or editing payments there are shortcuts to assist in speeding up processing.
-
Tab key
The Tab key moves the cursor to the next field in sequence.
-
Type-ahead
On search fields such as Matter, Supplier or GL Account, type numbers or letters and the list from which to select will be filtered.
-
Ctrl-Enter
Pressing the Ctrl and Enter keys together saves the payment at any stage.
-
Ctrl-Shift-Enter
Pressing the Ctrl, Shift and Enter keys together saves the payment and executes the Approve function.
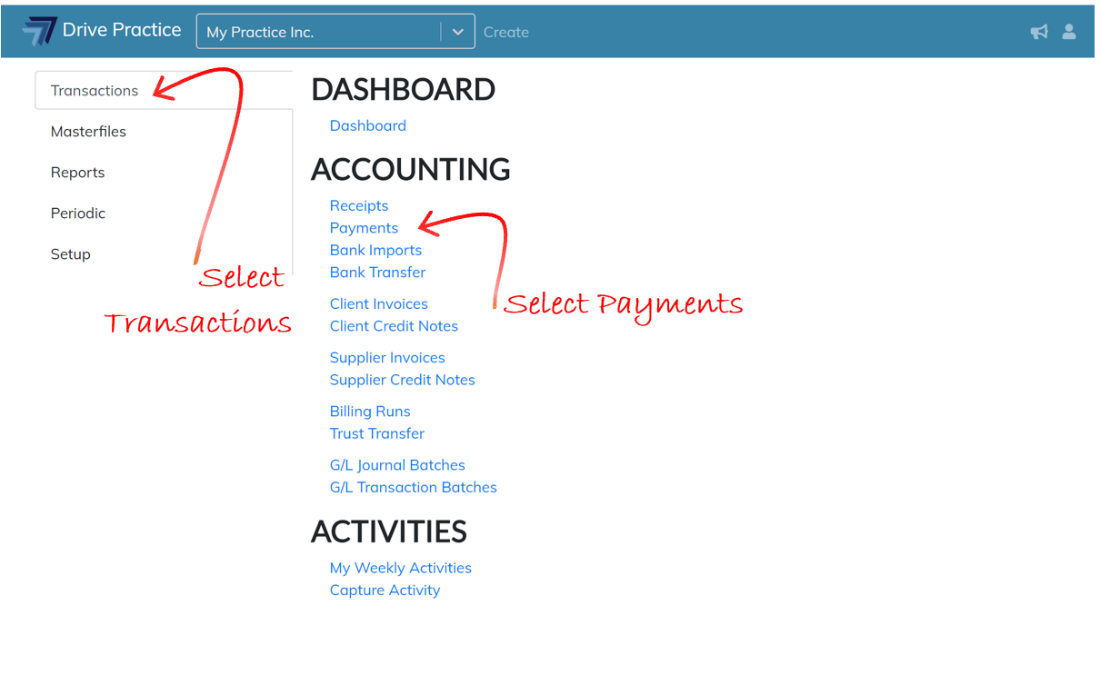
To access payments, click on the Drive Practice logo at the top of the page to open the main menu.
Click on the Transactions menu on the left, and then on Payments on the right.
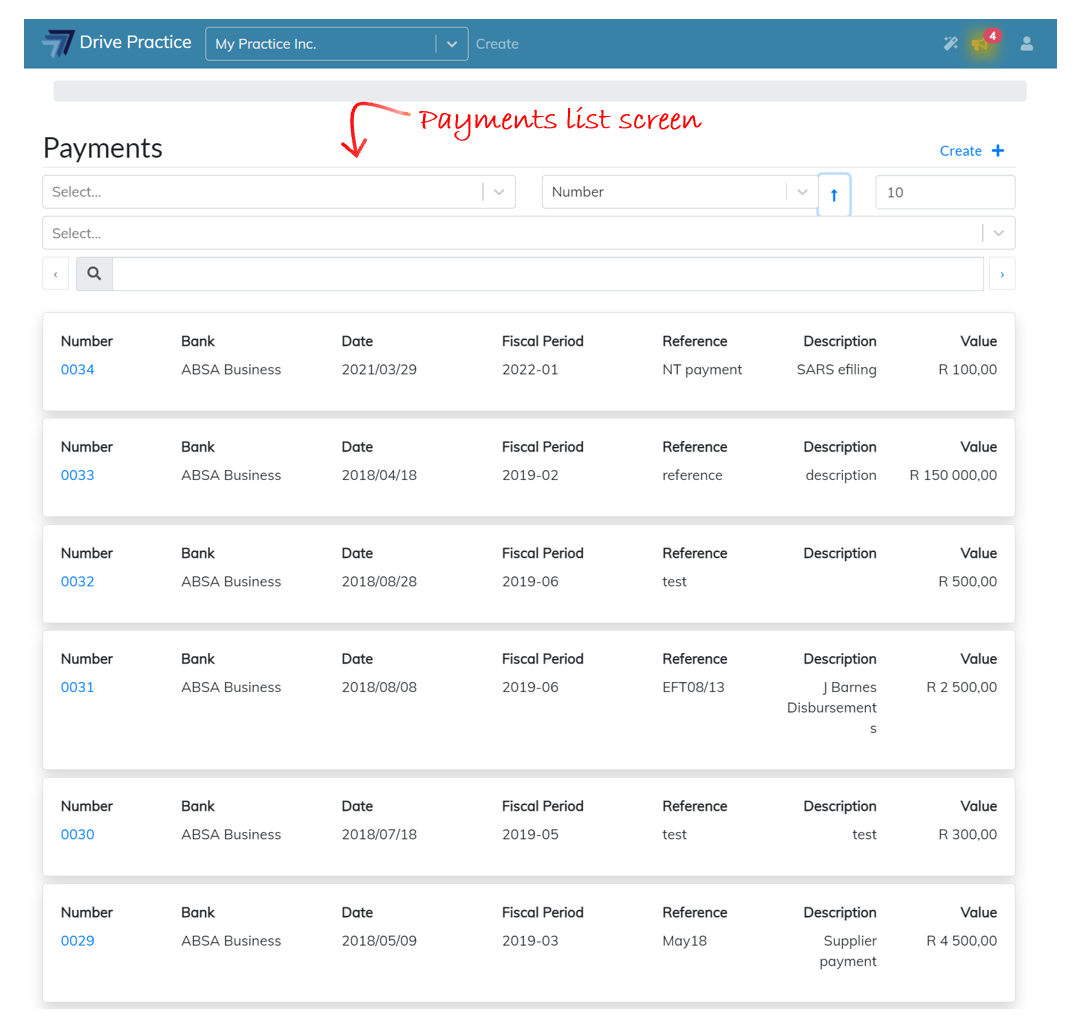
Payments List Screen
The Payments list screen will open which will display a list of all payments. Each payment card in the list displays a summary of the payment on each card.
At the top of the Payments list screen are filter, sort and search fields which are used to filter entries in the list to aid in finding entries quickly.
The first filter on the top left-hand side of the list, filters the list by the Approved or Not Approved status of a payment. To only show Approved entries in the list, click on the field and using the up and down arrow until Approved is highlighted and click enter to select, or click on Approved to select the Approved filter option.
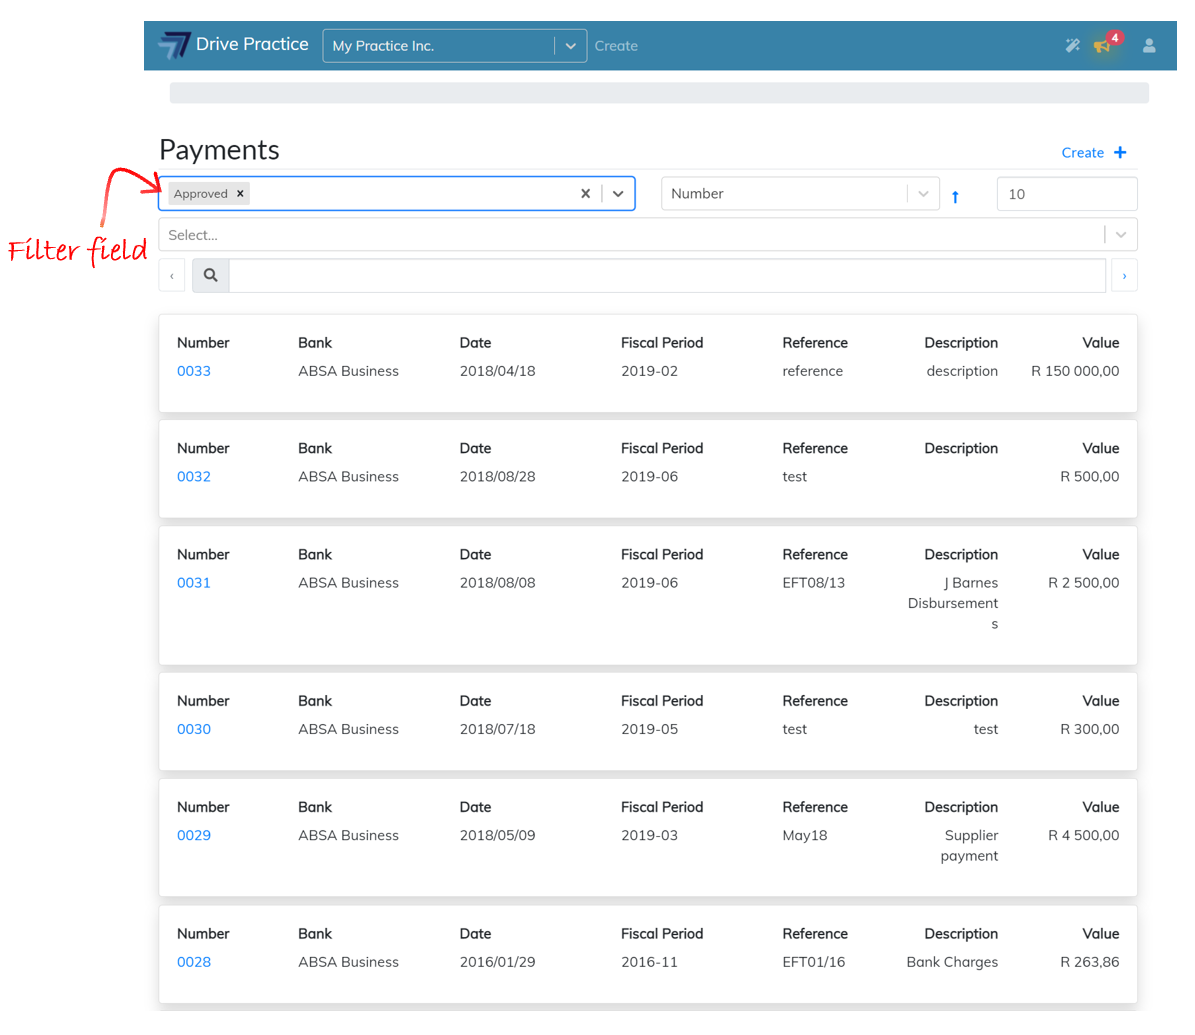
To only show entries in the list which are Not Approved, clear the Approved filter by clicking on the “x” next to Approved and select Not Approved as described above.

Both filters can be applied however filters execute as OR filters, not AND filters.
For example, selecting the “Approved” and “Not Approved” filters will return all payments (within any further filtering and search parameters entered) since the filter is read as “return all payments that are either Approved OR Not Approved”.
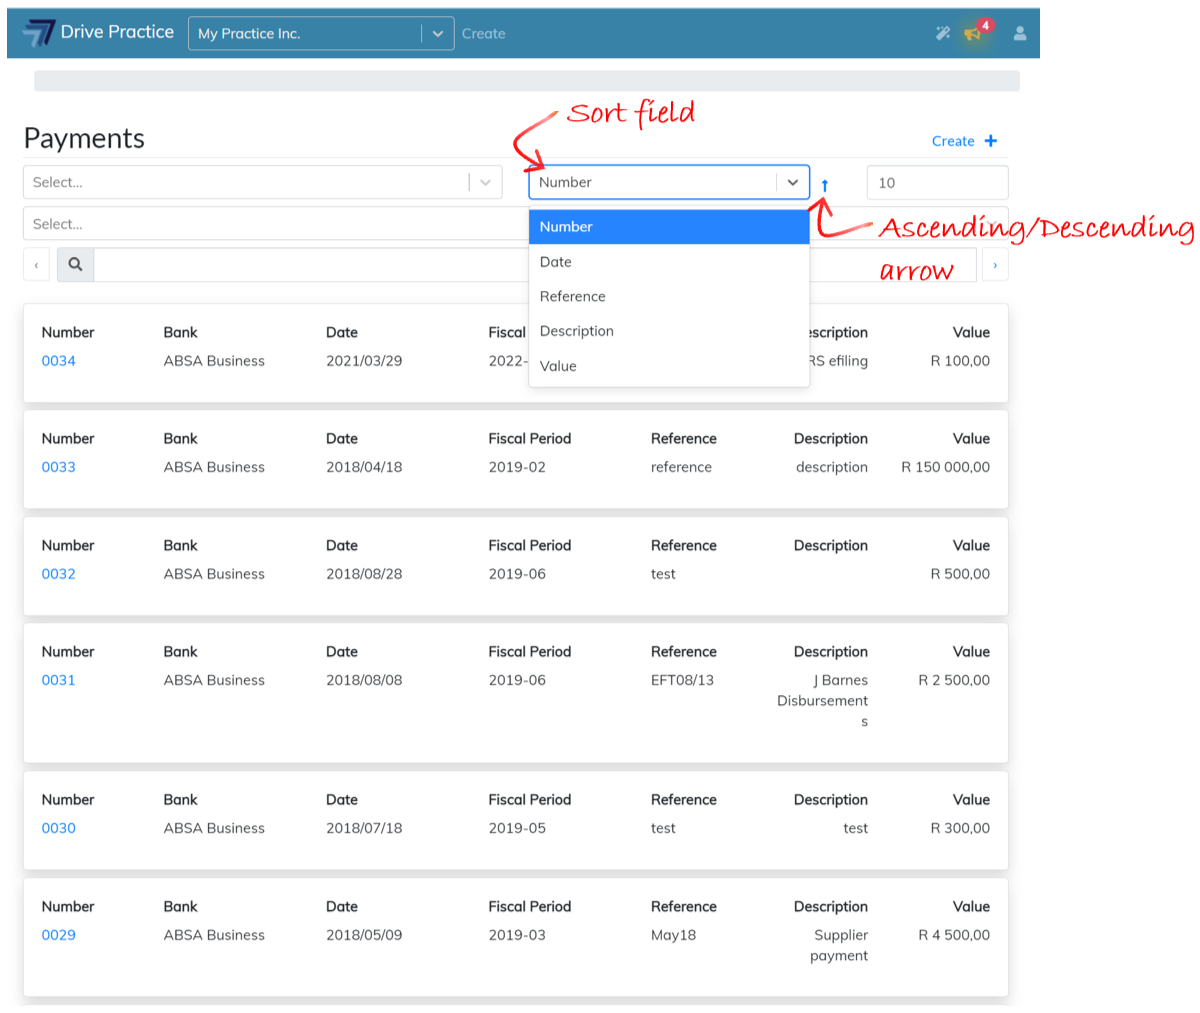
The field to the right of the approved status filter contains a list of fields by which the entries returned in the list can be sorted. Click on the sort field and use the up and down arrow keys to highlight the sort order required and press enter to select or click on the item in the list to select it.
To the right of the field is a blue arrow which denotes the sort order, which set to ascending order by default. Click on the arrow to change the sort order to descending. The arrow will change to point down, indicating that the sort order is descending.
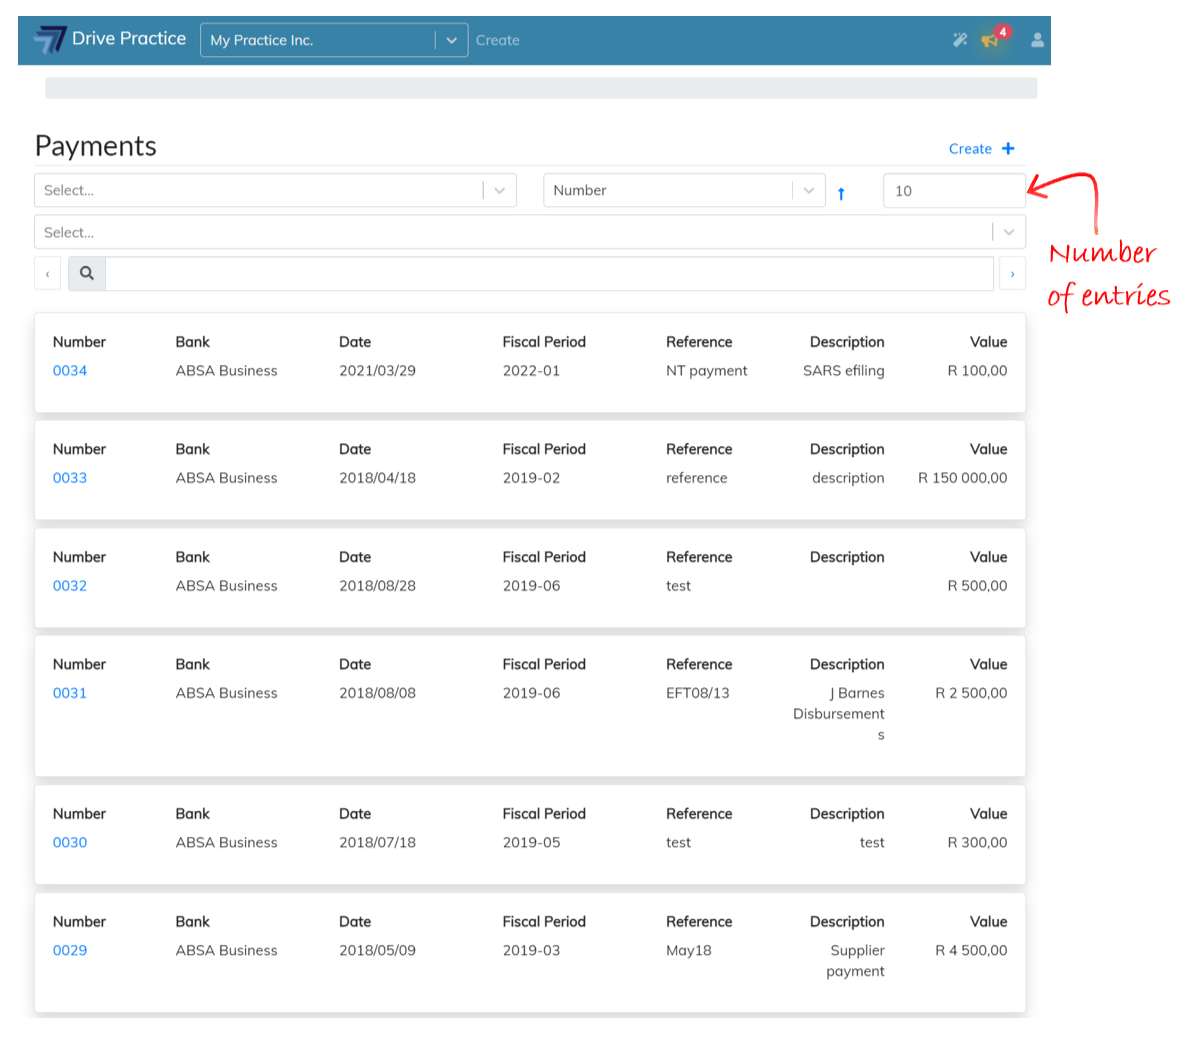
The last field in the top row next to the sort field is a field to control the number of entries returned on the screen. This field defaults to 10 but can be changed to any number desired and when many entries are selected for display the screen will need to be scrolled up and down to go to the end or back to the beginning of the list. To page through a list where an entry does not appear in the number of entries to be returned on the screen, use the arrow keys on either side of the search bar, or at the bottom of the entries returned on the screen to page forward and backwards through the list.
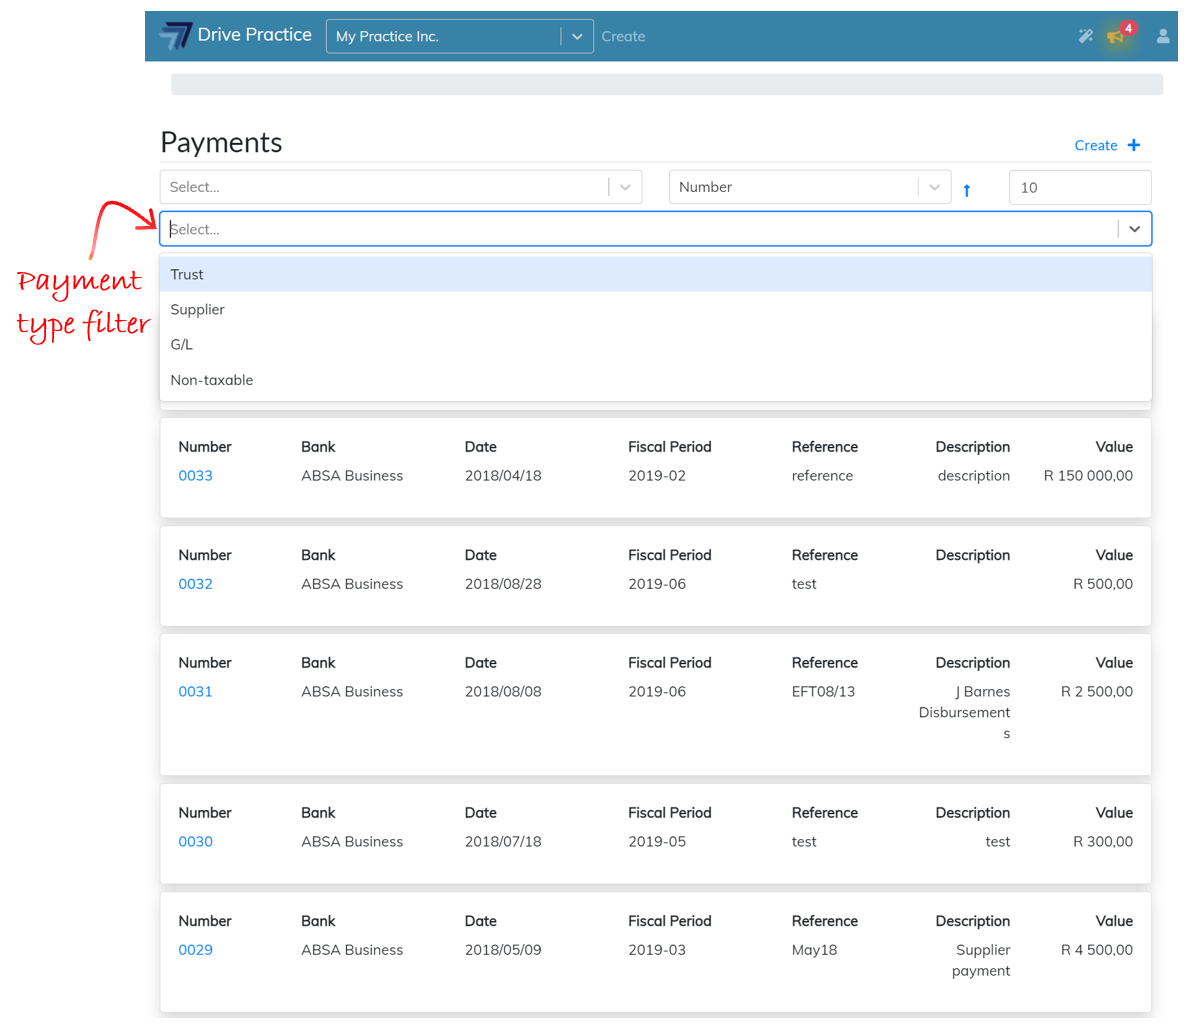
Below the first filter field is another filter which provides filtering of the list by type of payment. This filter only provides for one type of payment to be filtered at a time. Click on the field and select the payment type to filter the list by using the up and down arrow keys to highlight the required selection and press enter to select or click on the required payment type to select it.
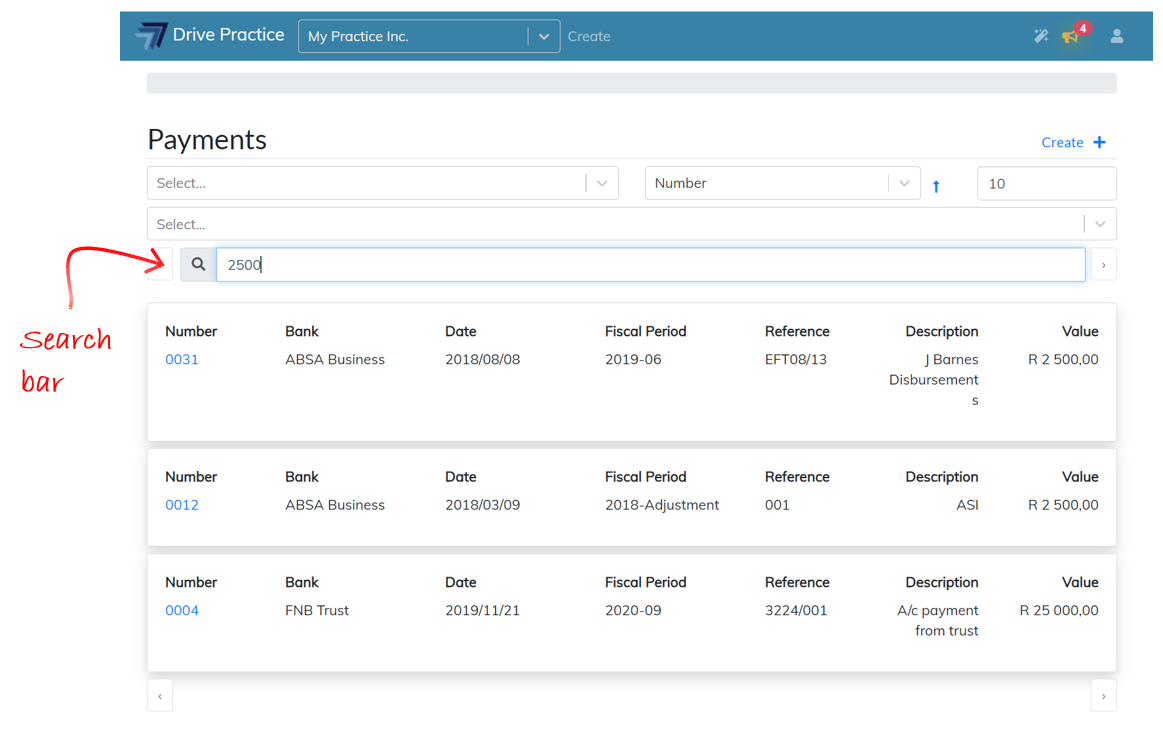
The search bar provides for any string of characters to be search on in the Number, Reference and Description fields on the list entry cards.