Create a new Journal
To create a new Journal, navigate to the Journals list screen and click on the Create button.
The Create G/L Journal Batch will open with fields to complete.
-
Number
The batch number is set to “—New—” for all new batches. Once a batch has been approved the next sequential journal number is assigned to the batch.
-
Batch Date
The batch date defaults to today but can be changed and the header batch date is used as the default date for each allocation in the batch, which can be overridden on each entry on the journal, if required.
-
Fiscal Period
The Fiscal Period defaults to the fiscal period within which the batch date falls. If the batch date is changed, the fiscal period will automatically change. If a batch is to be posted to a different fiscal period from within which the batch date falls, the fiscal period can be overridden once the batch date has been set. All entries in the batch, irrespective of their entry date which may be changed from the batch date default, will be posted to this fiscal period.
-
Description
Enter a description for the journal batch. This description will show up and be searchable in the G/L Journal Batches list screen and defaults as the description for each allocation on the journal entry.
-
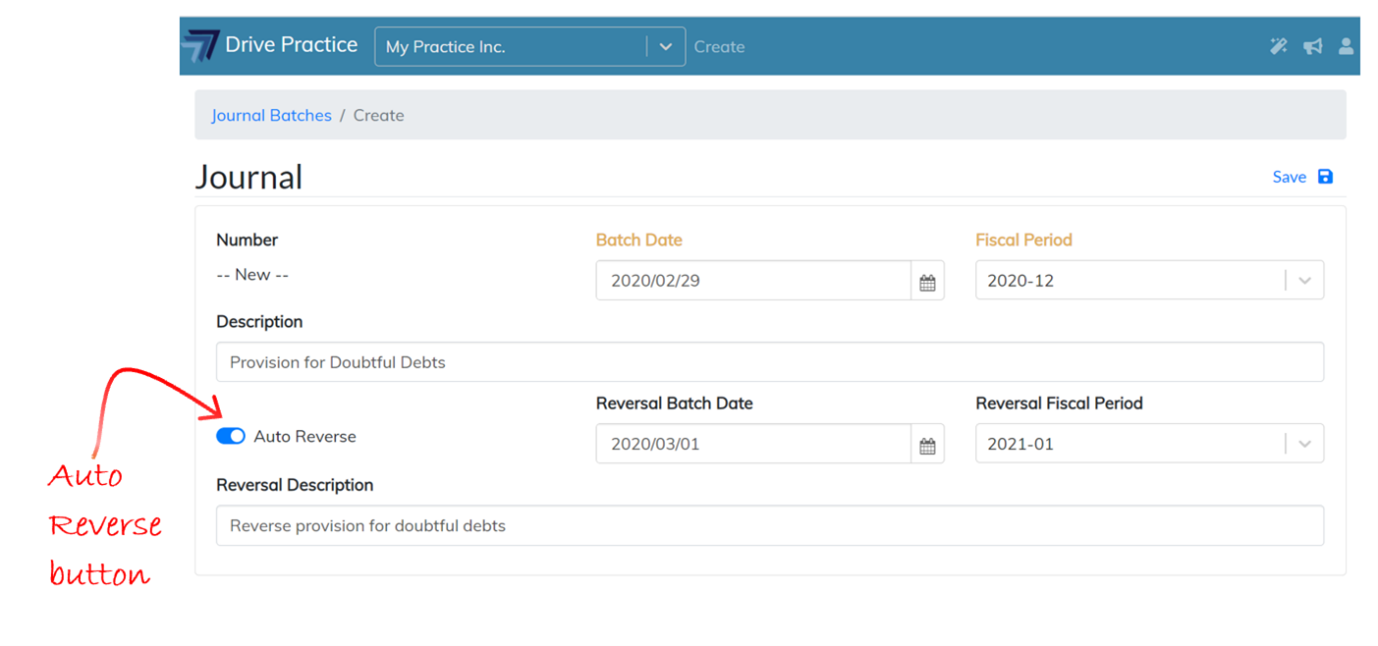
Auto-reverse
Auto-reverse is used when the Journal should be automatically reversed in another future period and is particularly useful when creating accruals or provisions at financial year end.
When turned on, the auto-reverse option will provide another three fields, Reversal Batch Date, Reversal Fiscal Period and Reversal Description. Because the reversal Fiscal Period is a future period, make sure that the period has been created if it is in a new fiscal calendar, and that it is open, otherwise the approve function will fail with an error and neither the current journal or the reversal journal will be posted.
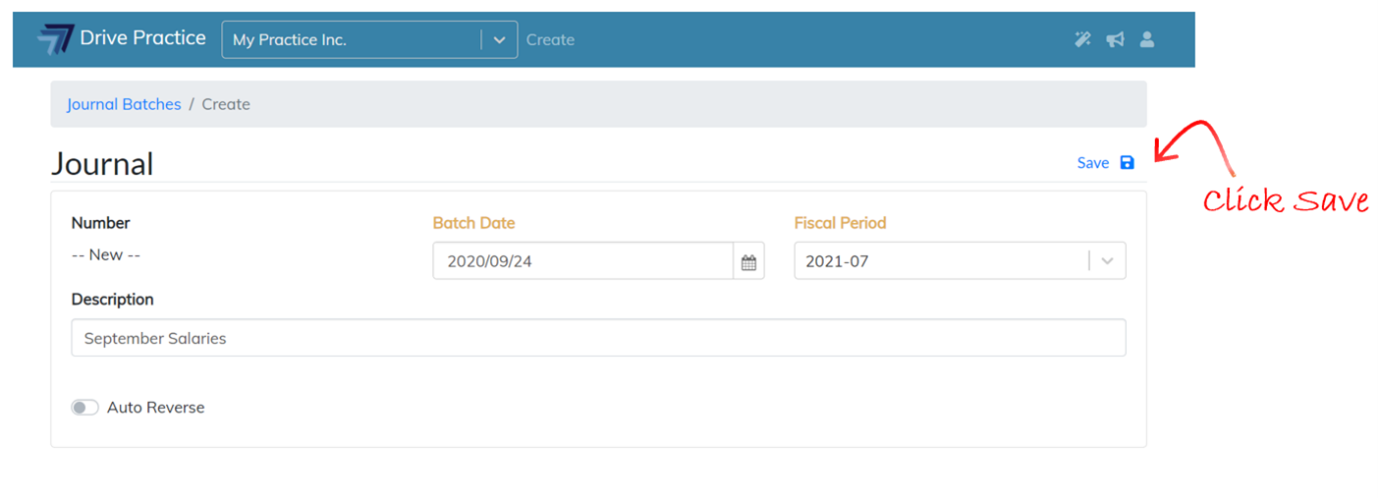
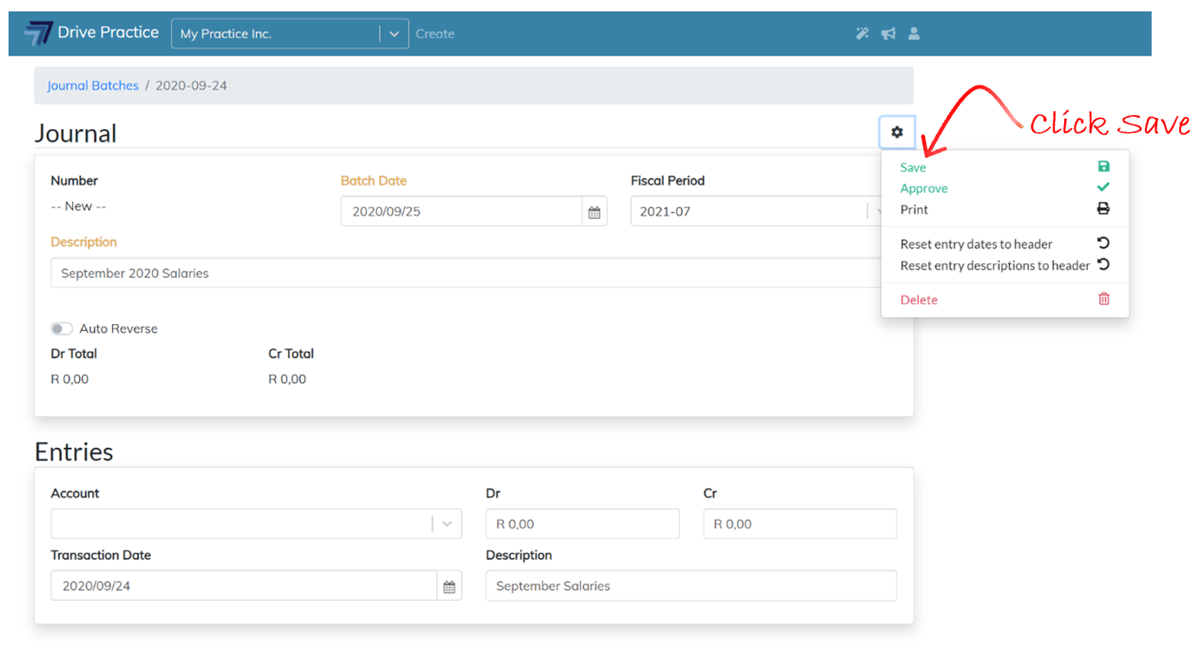
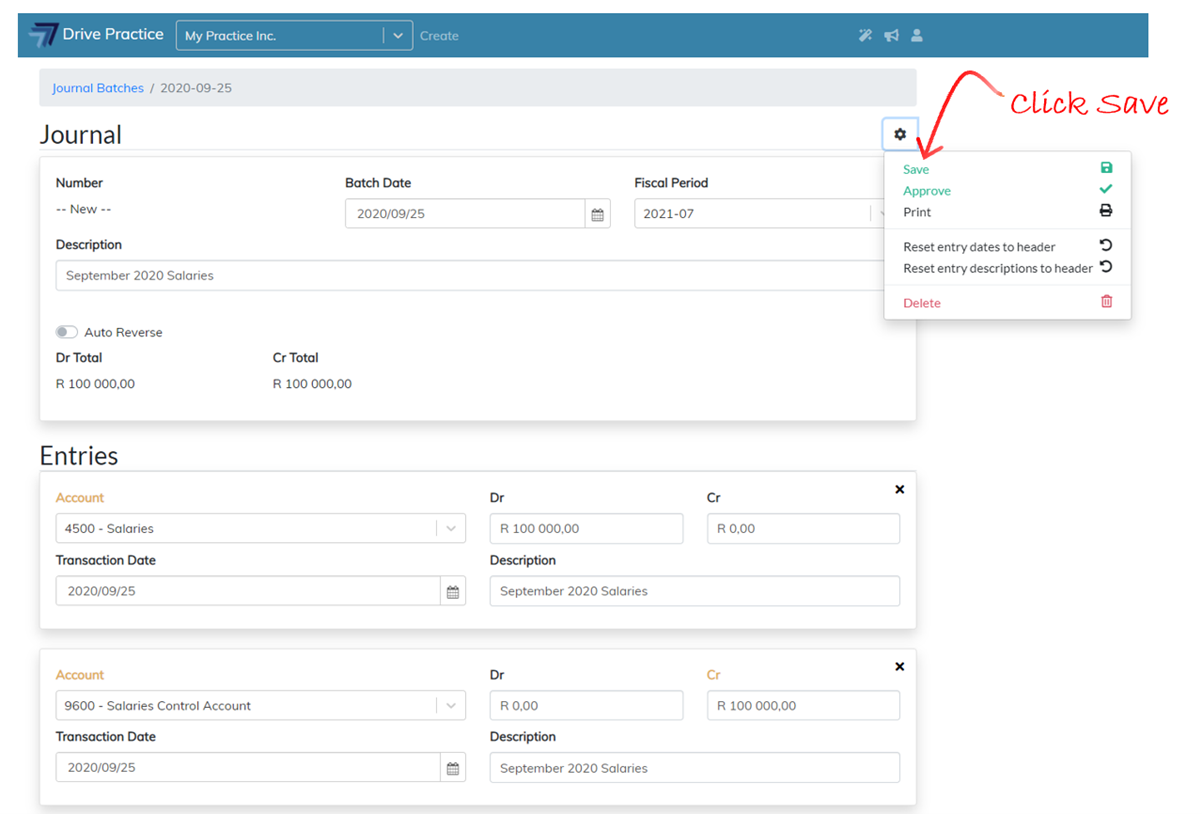
Once all the fields are completed, click on the Save button, or use the shortcut key Ctrl-Enter to save the Journal Header.
The Journal page will open with the Journal Header fields that can be edited and the first entry section to complete.
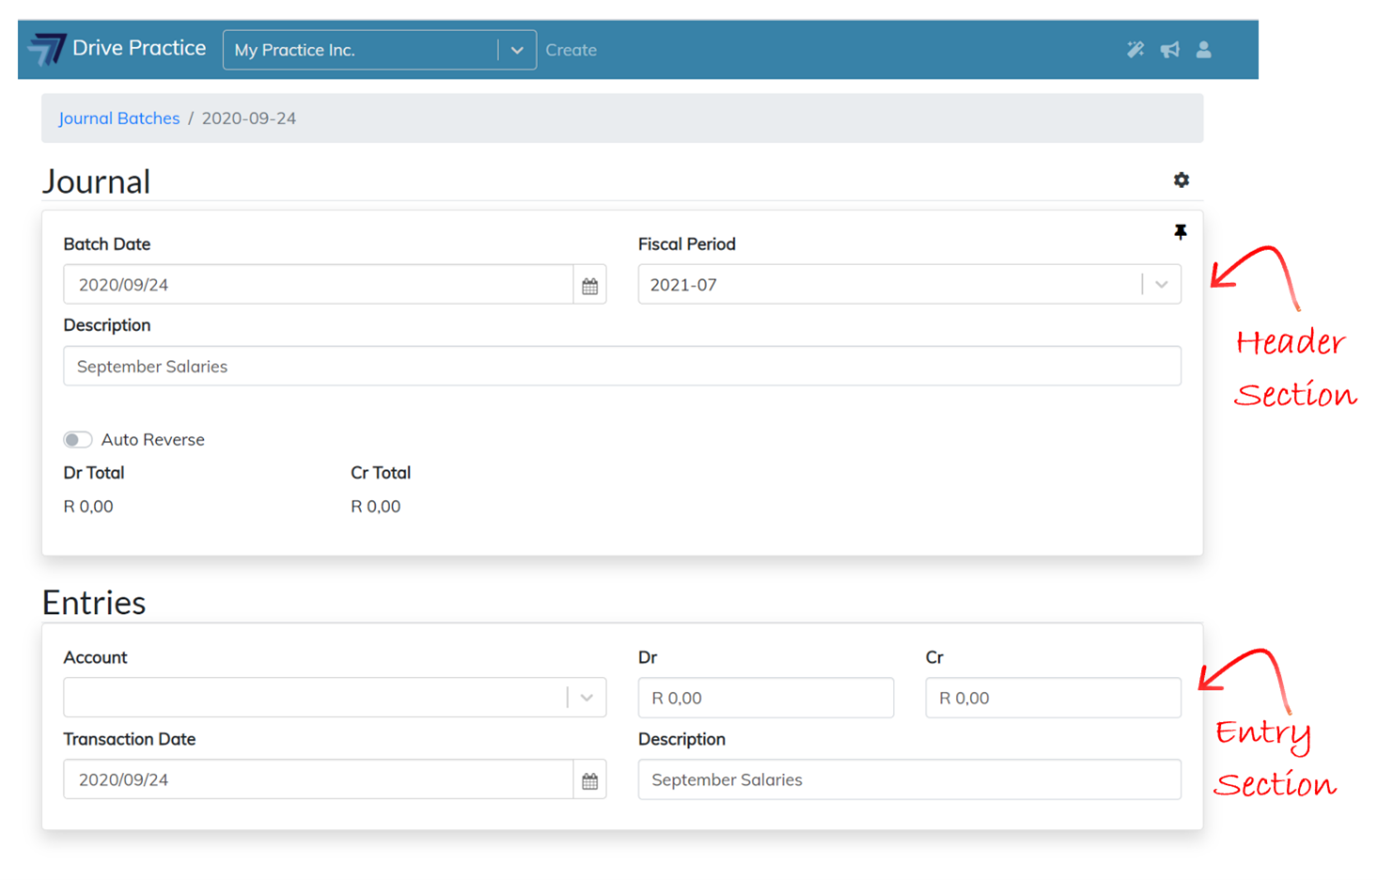
The Journal Header fields (described above on the Create Journal screen), have additional fields visible after the Journal is created and these fields are described below.
-
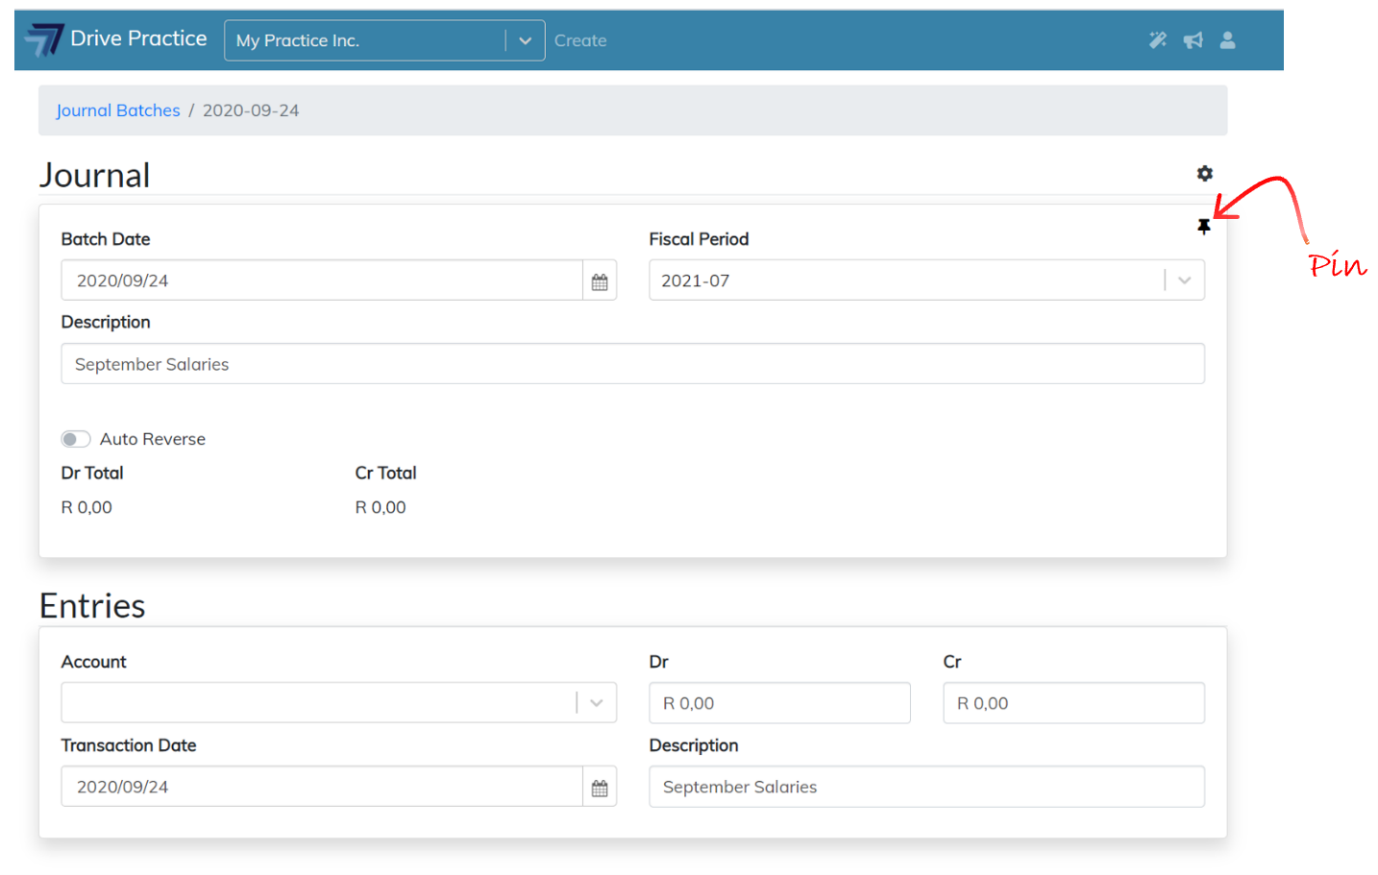
Pin Icon
The Pin icon, located on the top right of the Header section, is used to pin or unpin the Header section to the top of the screen. When the Header section is pinned (icon turns red) it remains on the screen and the Entries slide under the Header section.
In this way, you are able to see the Debit and Credit totals that are re-calculated and updated on the Header as entries are added without having to scroll up and down a journal with many entries.
-
Dr Total
The Dr Total field is not editable and is calculated as the total of the saved Debit entries.
-
Cr Total
The Cr Total field is not editable and is calculated as the total of the saved Credit entries.
Edit Header
To edit the Header fields, click on the field and change the entered data. The field name(s) of the field(s) edited turn yellow, indicating that the field has been edited.
Click the Gear icon at the top right of the Journal Header and then click on the Save menu item or use the shortcut key Ctrl-Enter to save the amendments. The field names will revert to black indicating that the changes have been saved.
Entries
To capture the journal entries, complete the fields in the entry card. The fields are explained below.
-
Account
Click in the field to open the dropdown list or start typing the account name or number to search for the account. Double click on the matter line to select it or use the up and down arrow keys to move to the account and then press enter.
-
Dr
If the entry is a debit, enter the amount in this field.
-
Cr
If the entry is a credit, enter the amount in this field. If an amount was entered in the debit field it will revert to zero, likewise, the credit amount will revert to zero if an amount is entered in the credit field and an amount is then entered in the debit field.
-
Transaction Date
This date defaults from the Batch Date on the Header but can be overridden.
-
Description
This field defaults from the Description on the Header but can be edited or overridden.
Note that the field name(s) for the field(s) that have been changed turn yellow. This is to indicate that the journal entry needs to be saved to save the changes made to the fields.
Click on the Gear icon at the top right of the payment and then click on the Save menu item or use the shortcut key Ctrl-Enter to save the allocation.
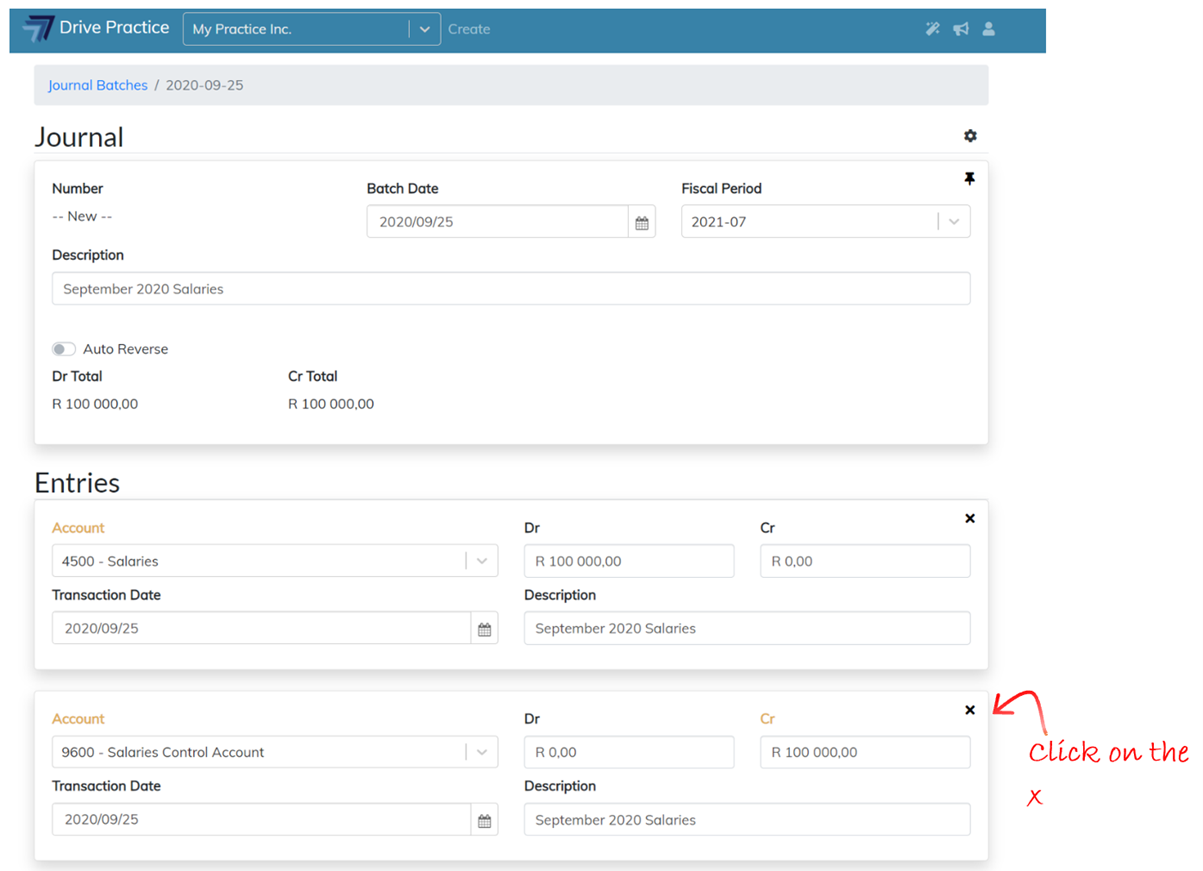
If an error has been made on an entry or additional entries need to be removed, click on the X at the top right of the entry to delete it.
Add in additional entries until the Total Debit and Total Credit fields on the Journal Header are in balance.
When all the entries have been captured and the batch is in balance, the batch can be approved as explained in the Approve, Delete or Reverse section below.
Edit Entries
The fields in the Entries section are open for editing. The field headers of the fields that have been edited will change to yellow to indicate that the changes need to be saved.
Click the Gear icon on the right of the Journal Header section and then click on Save or use the shortcut key Ctrl-Enter to save the amendments. Once saved, the field names will revert to black indicating that the changes have been saved.