Timers
[Last edited 02 July 2020]
The Timers Global Action function is unique to the Global Actions menu.
Timers are used to log work performed and can be converted into an activity for a matter. Multiple timers can be created but only one timer can be active at any time.
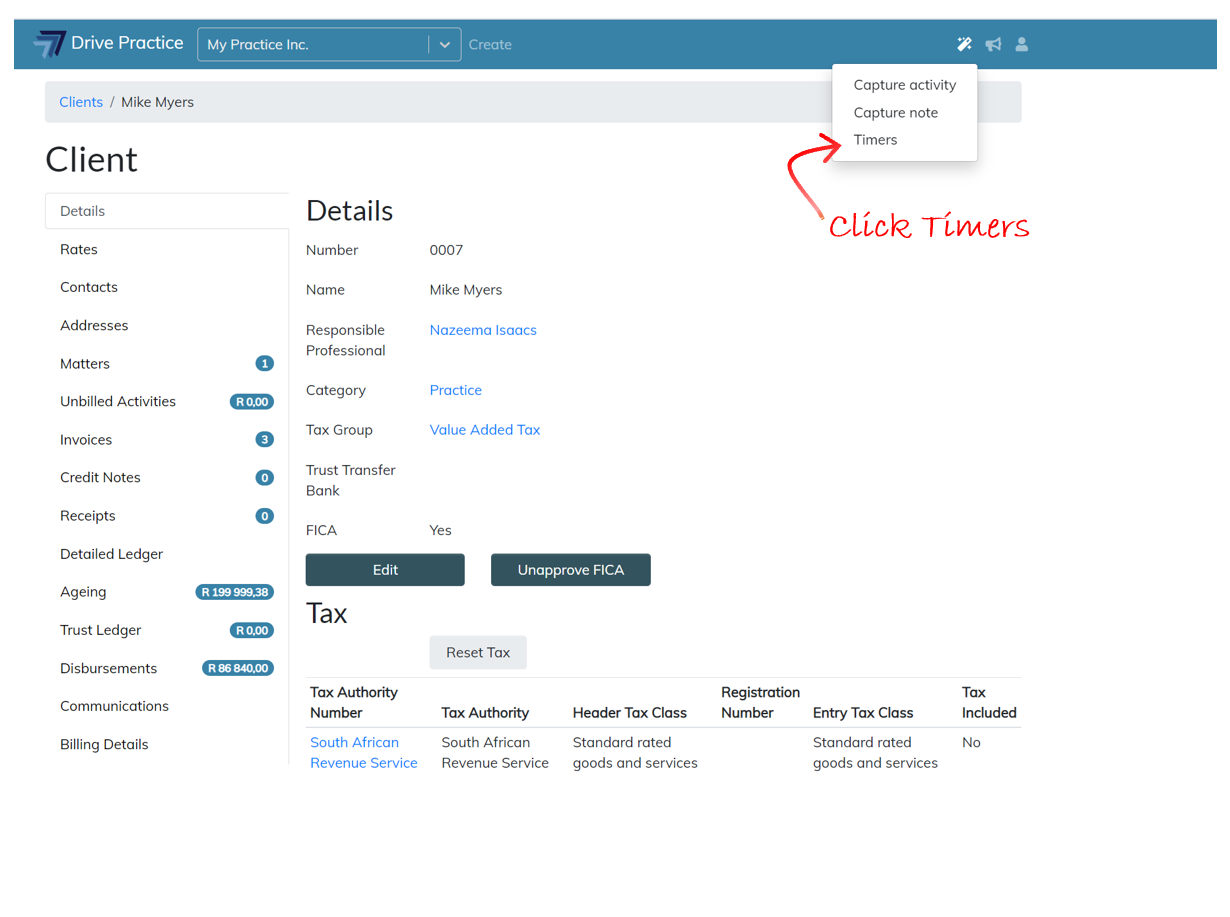
To use Timers Global Action, click on the Wand icon at the top right of the screen next to the Announcement button. Click on the Timers option.
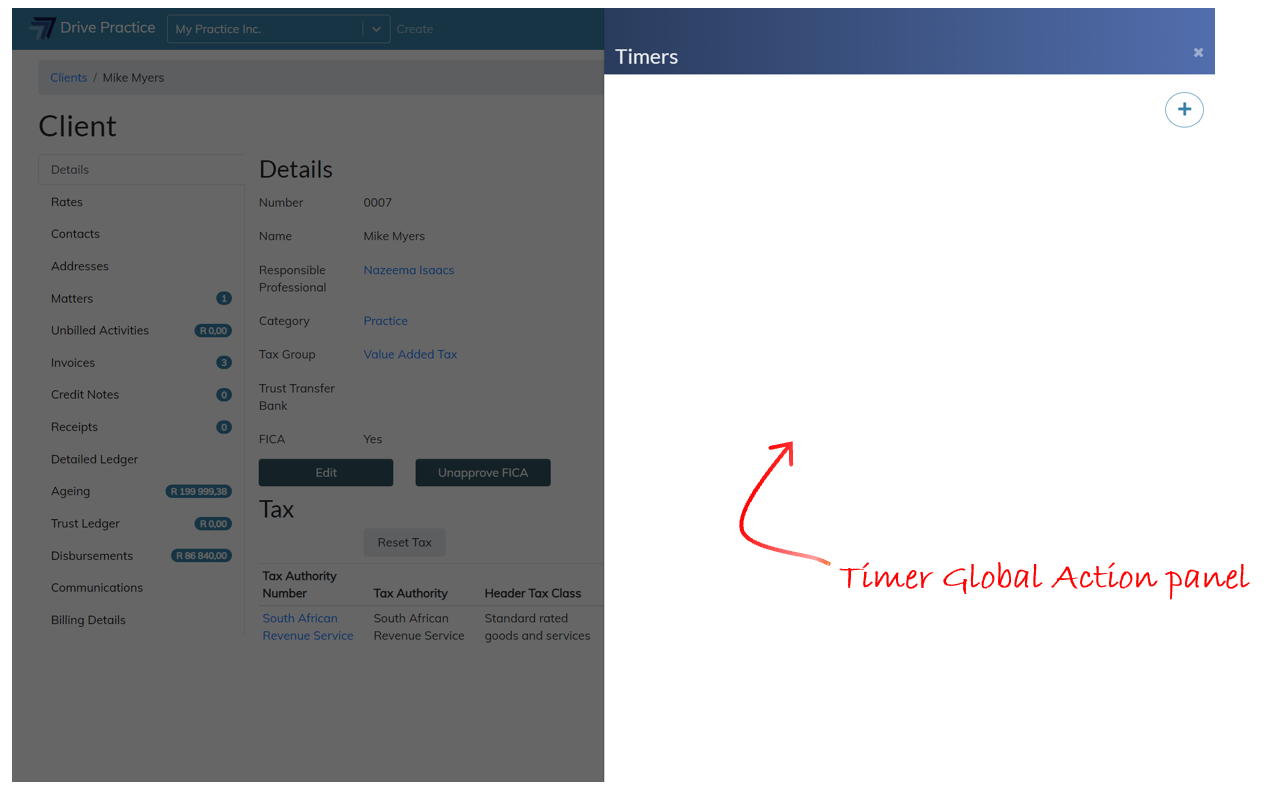
The Timers Global Action panel will open on the right of the screen.
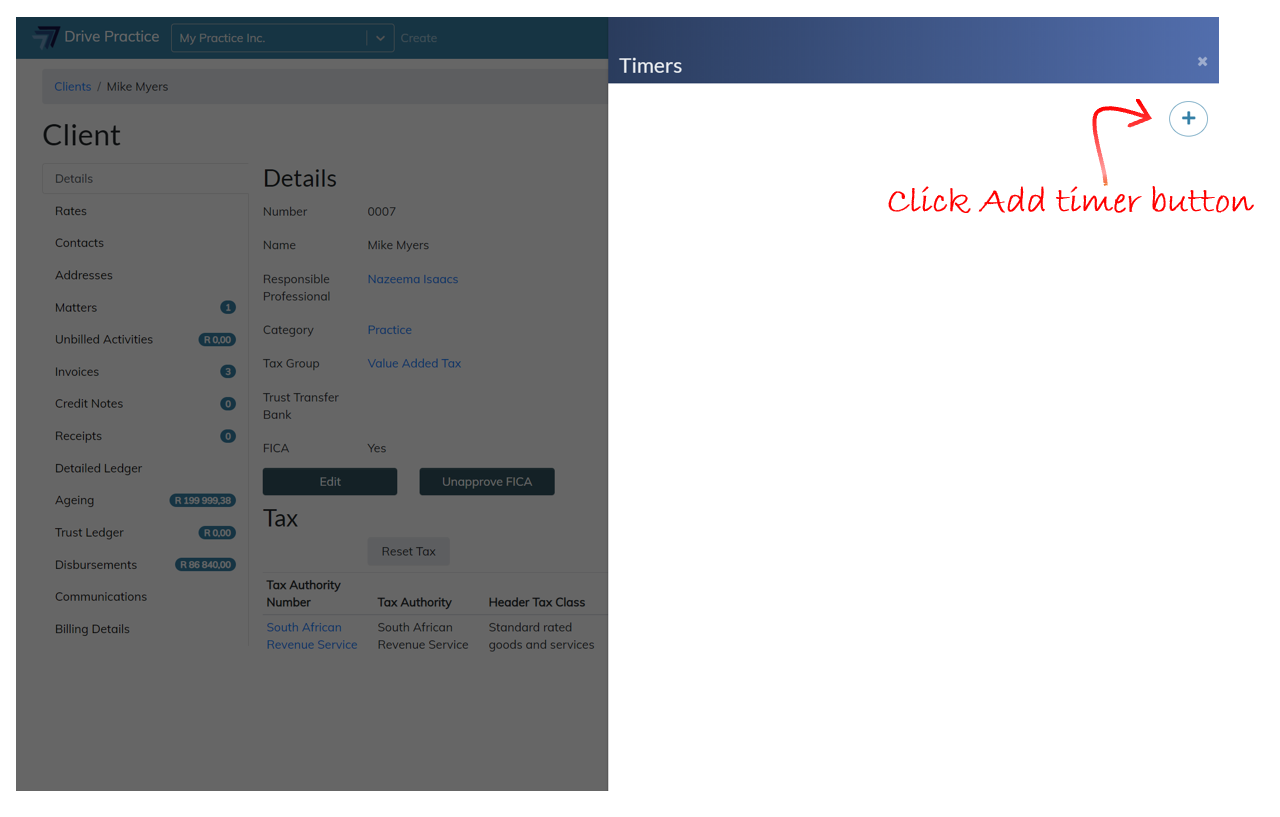
To add a Timer, click on the Add timer button on the top right of the Timers panel.
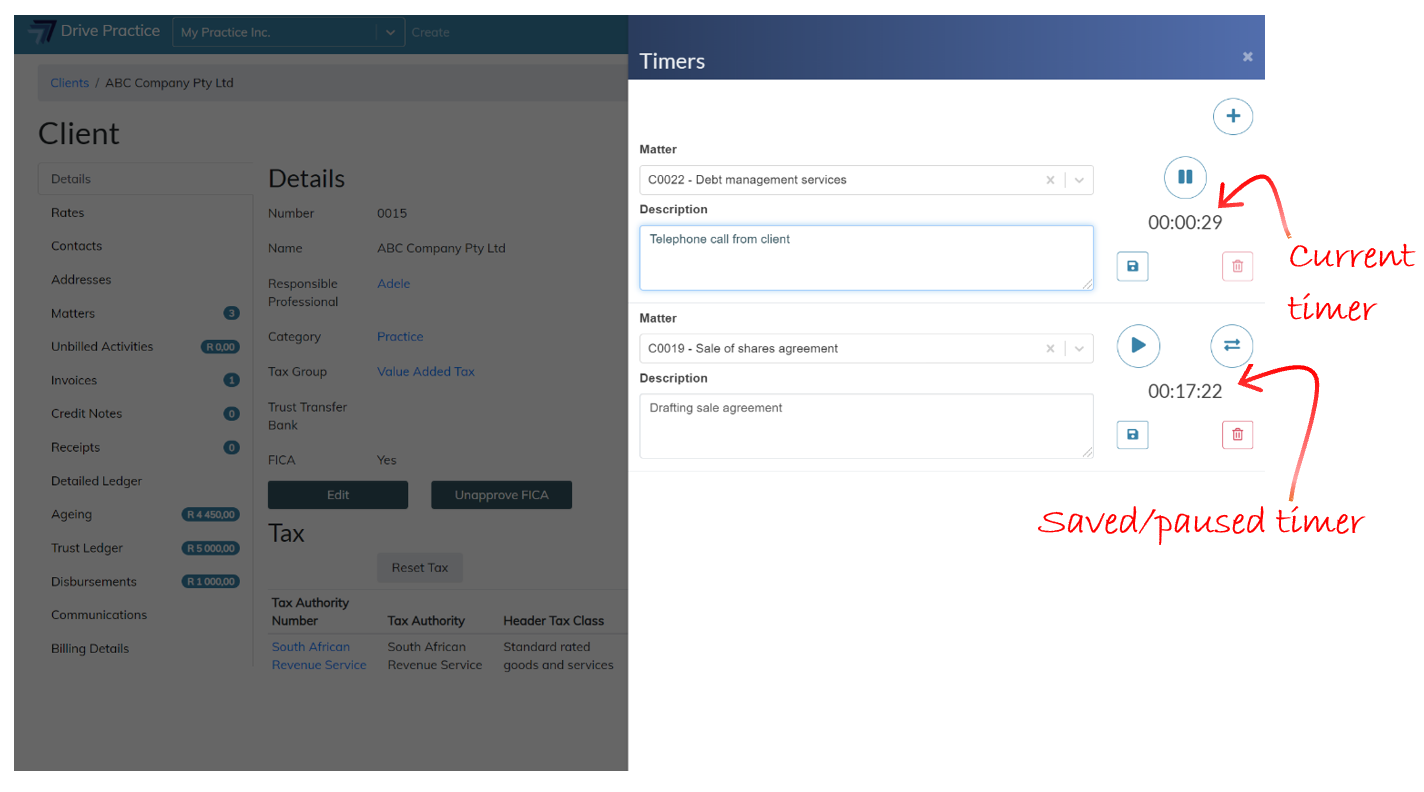
A Timer will open and will immediately begin recording time. A Timer has two fields and four action buttons.
Once the Timers panel has timers that have been added, the panel can be closed to return to the context you were in before the Timers Global Action panel was opened, or to continue work in another application such as Word. The timer will continue to run until you open the panel again to pause the timer, convert it to a billable activity, or delete it.
The Timers fields and buttons are described below.
-
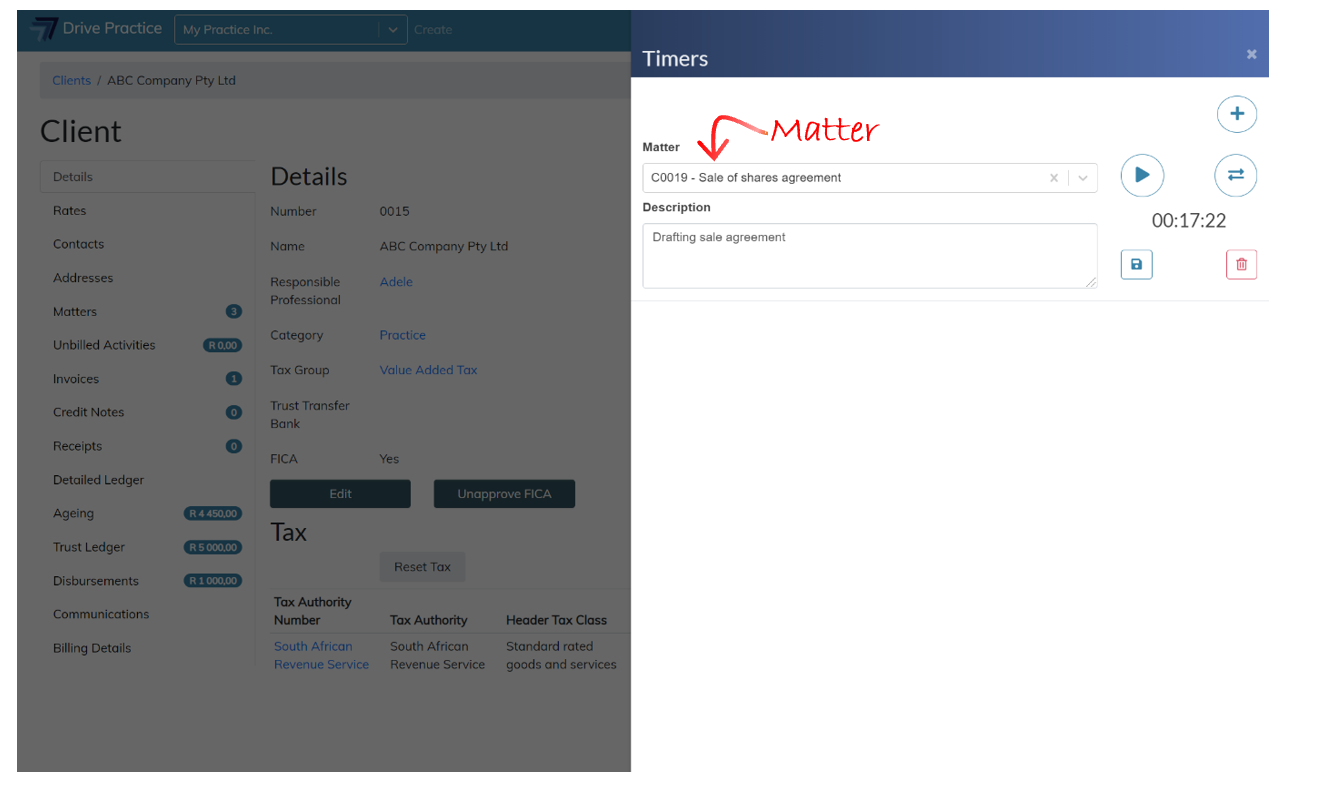
Matter
This field is used to allocate the time recorded to a matter. It is not a required field and can be completed at any time, although if you have created multiple timers it would be good practice to allocate the timers to matters to avoid confusion.
Type a few characters of the matter name, matter number or client name to filter the list of matters to select from. Use the up and down arrow keys to navigate to the desired matter and press enter to select, or click on the matter to select.
-
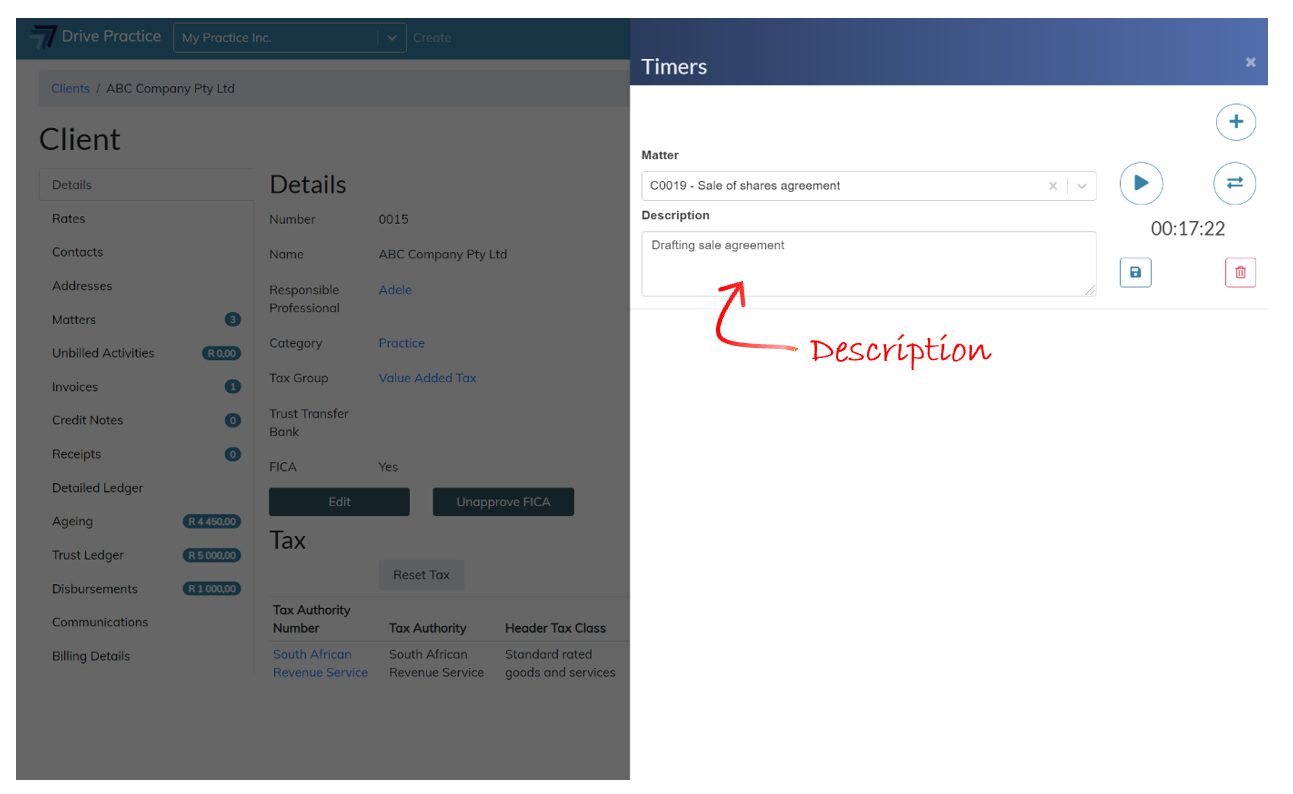
Description
This field is used to describe the work performed for the time recorded by the timer. It is not a required field and can be completed at any time or even left blank if the activity type that the recorded time will be converted to has a pre-defined description.
-
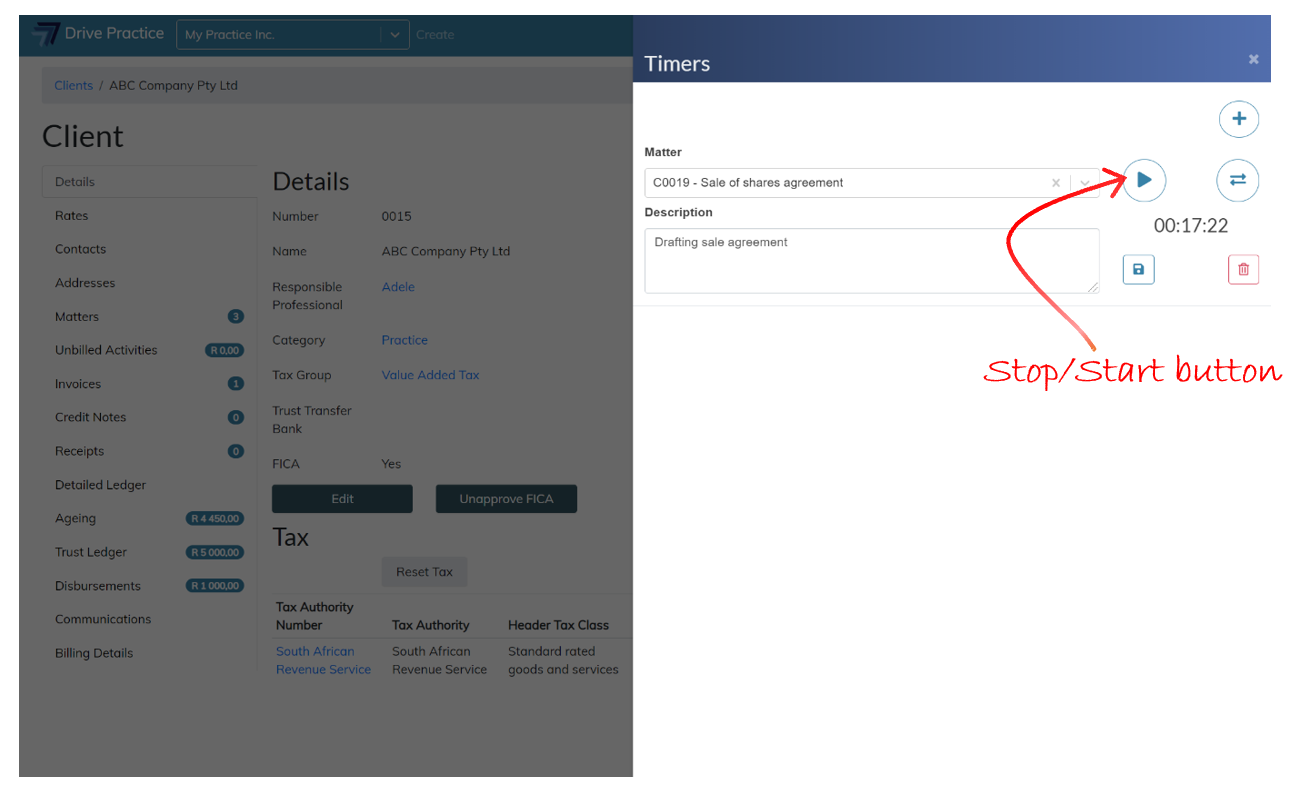
Stop/Start button
This button is used Pause and Play the timer. When the timer is active the button will show as a Pause button and when clicked to stop the timer it will change to a Play button.
-
Convert to Activity button
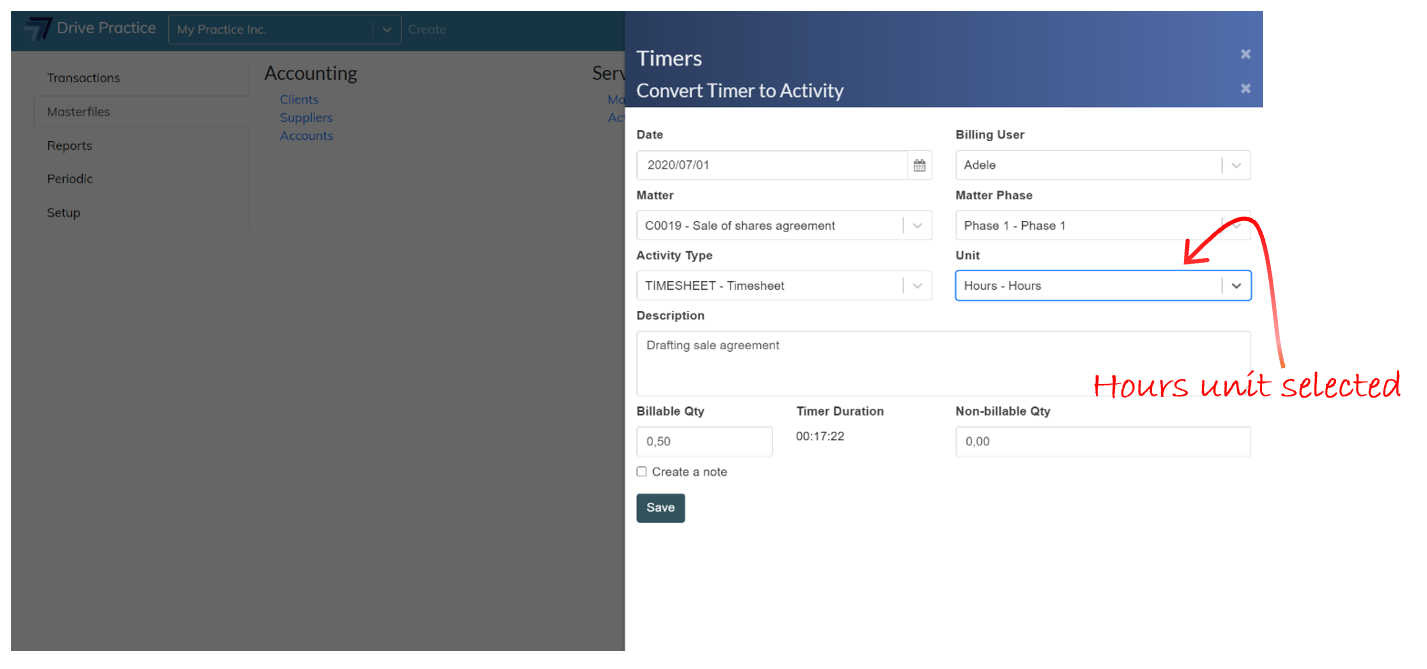
This button, when clicked opens the Capture Activity Global Action panel and populates the date field with the timer’s date and the it’s matter and description if those fields were populated on the timer.
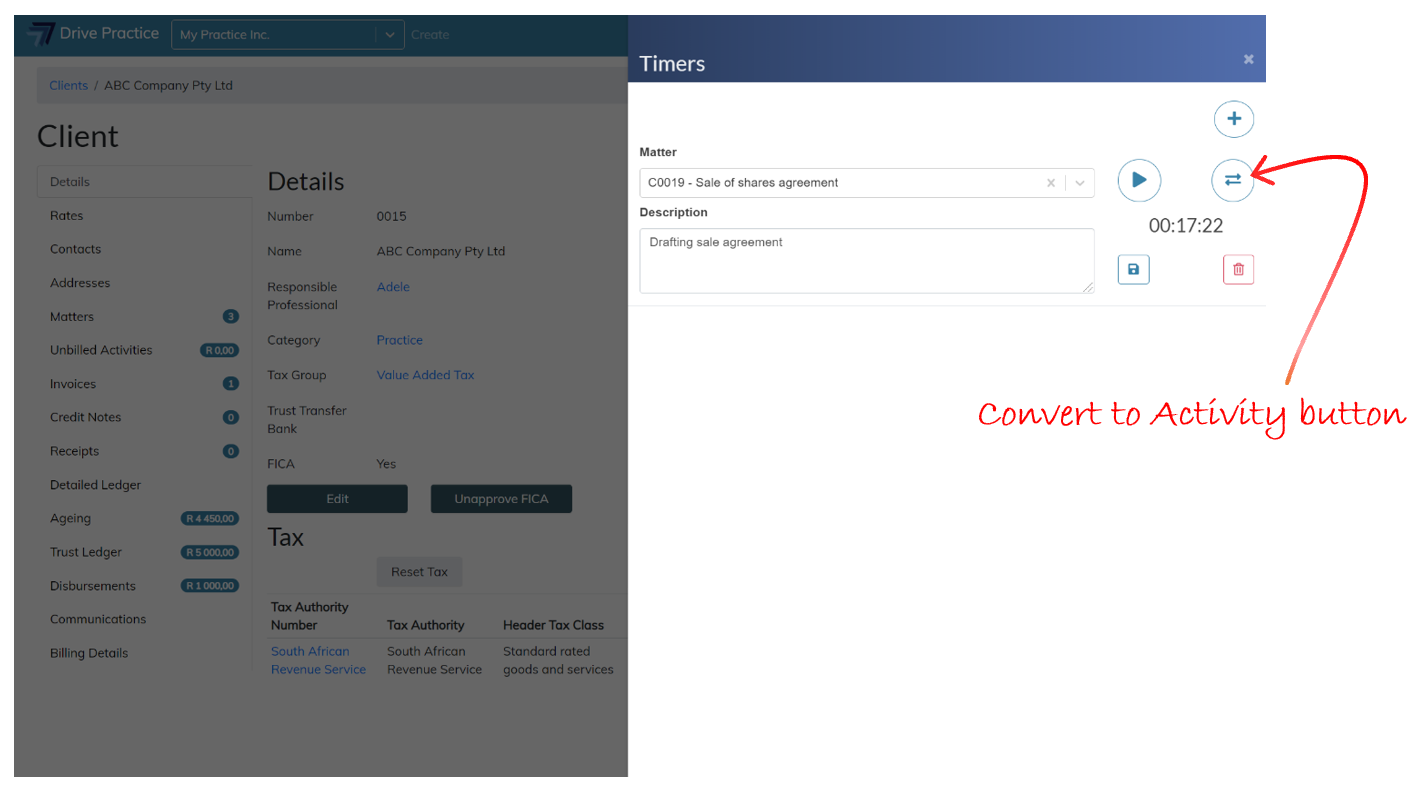
To complete the conversion to an activity, the additional fields such as the Matter Phase, Activity Type and Unit will need to be completed in order for the system to calculate the billable quantity to auto populate the Billable Qty field.
The Billable Qty field amount is calculated from the Activity Type and Unit. In the screenshot below, the Activity Type selected is Timesheet and the Unit on the Activity Type selected is Hours.
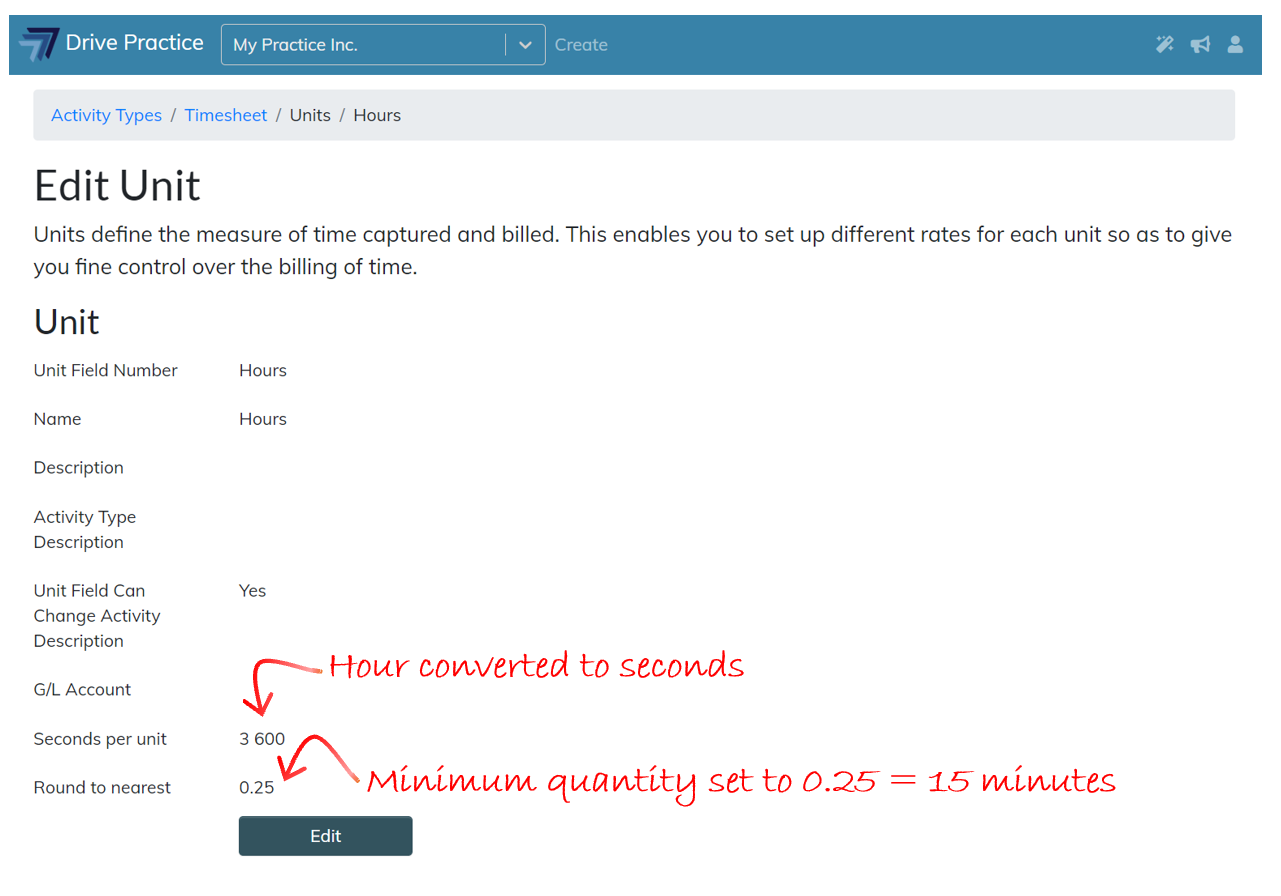
The Activity Type Unit options in this example are Day Fee, Half Day Fee and Hours. The Hours unit’s “Seconds per unit” field is set up as being 3600 seconds long (i.e. 1 hour), and the “Round to nearest” field is set to 0,25 or 15 minutes, being one quarter of an hour. The screenshot below shows the set up of the Activity Type Unit selected.
The Billable Qty field for this Activity Type’s Unit selection has therefore calculated as 0.50. Note that the actual time (17 minutes and 22 seconds) is displayed and stored with the converted activity, but that it is rounded up to the nearest minimum multiple of the Unit.
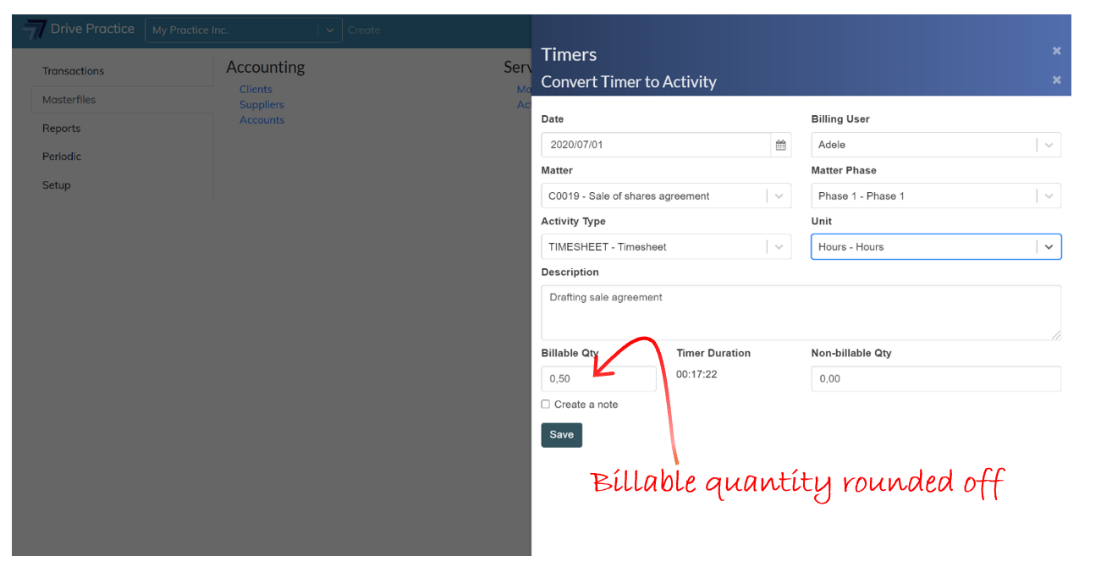
The Billable Qty can be edited as can the Non-billable Qty, just as if this was a Capture Activity.
Once all the fields of the Capture Activity are populated, click on the Save button or use the Ctrl-Enter shortcut key to save.
-
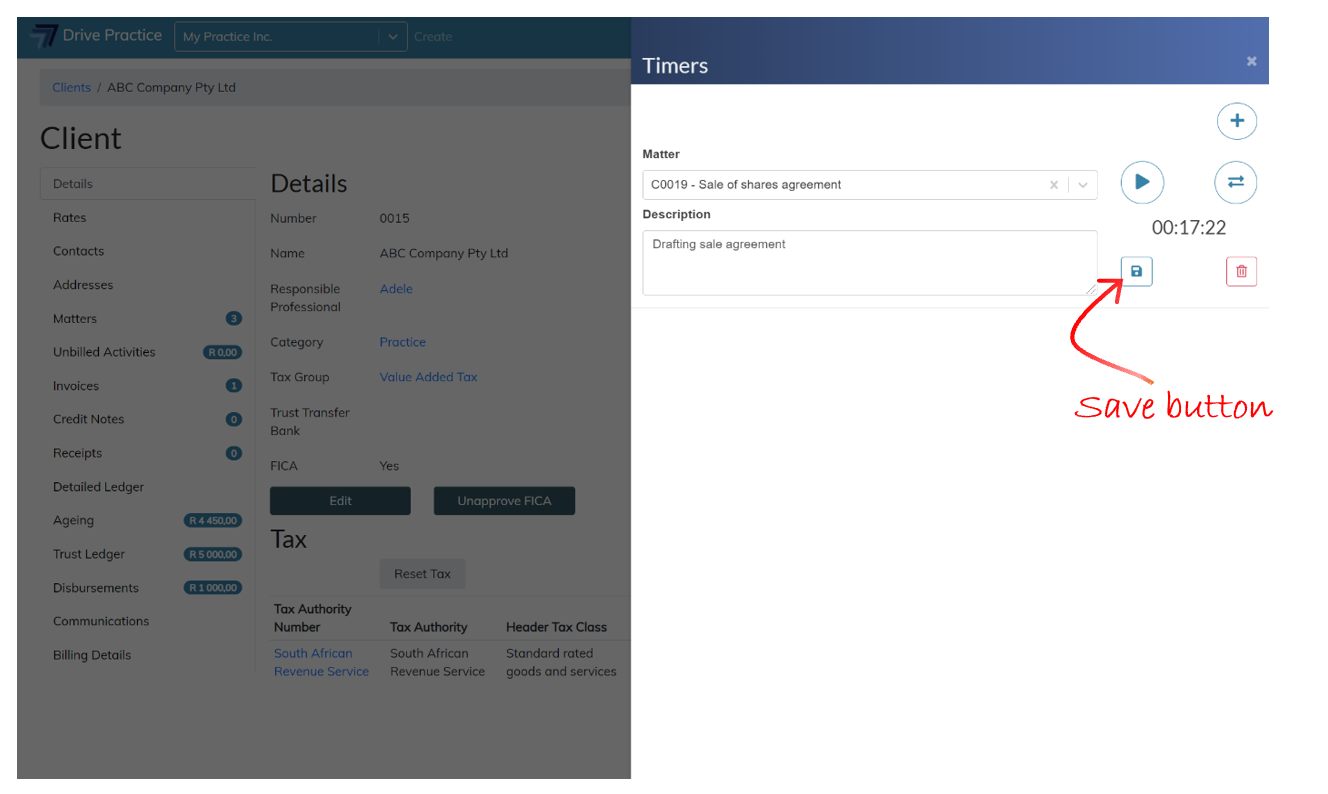
Save button
The Save button is used to save changes to the timer’s matter allocation or description.
-
Delete button
The Delete button is used to delete a timer that is not required any longer.
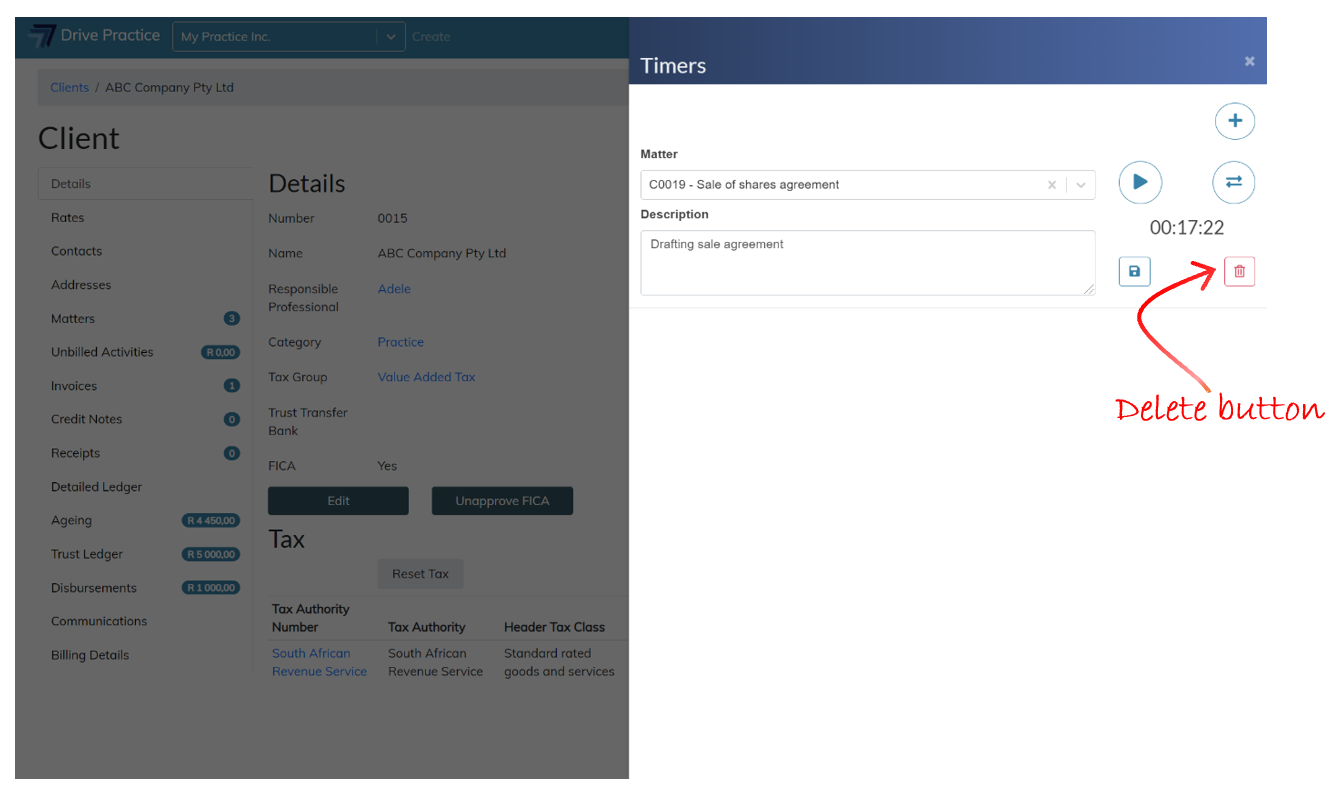
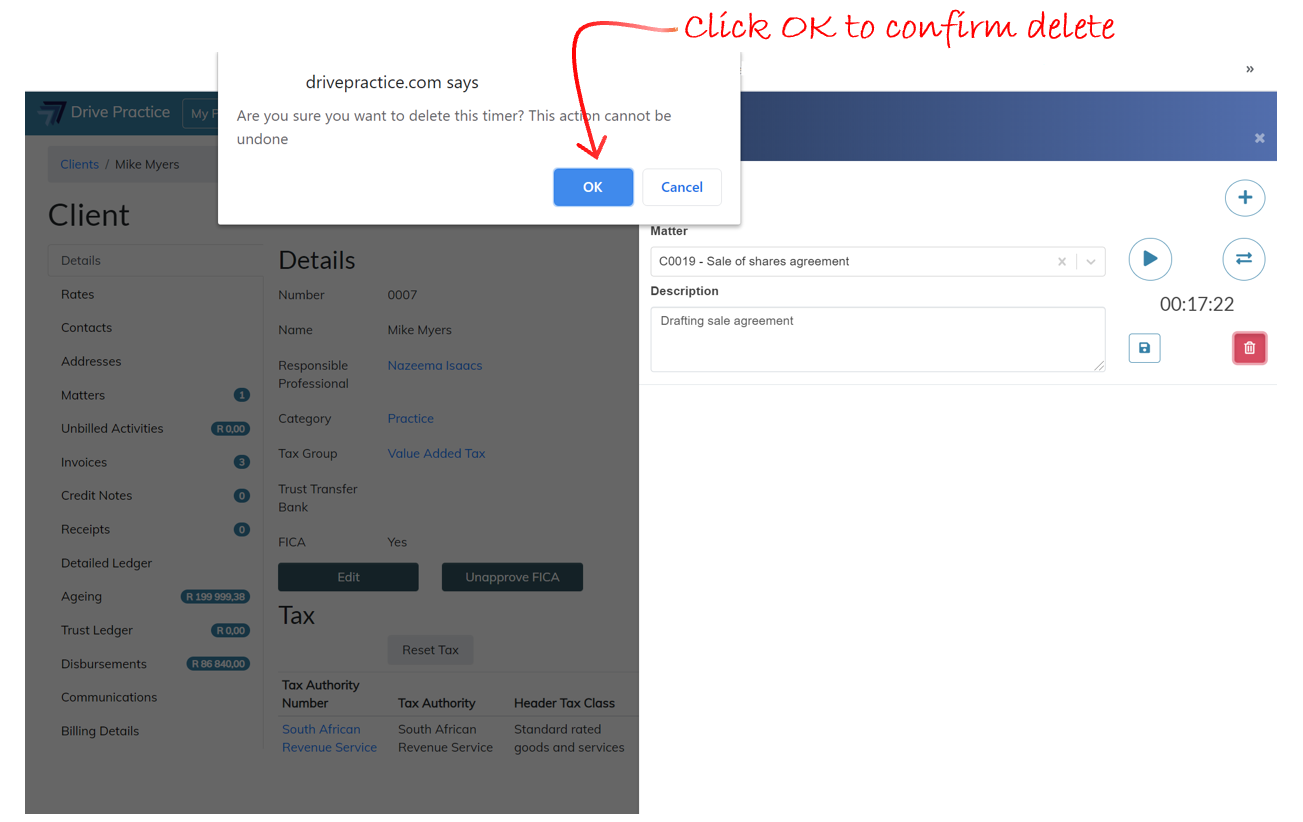
Click on Delete to delete the Timer. A message will then display to confirm the deletion. Click on OK to confirm the deletion or Cancel to cancel the deletion.
Multiple Timers
Multiple timers can be created, simply by clicking on the Add Timer button.
When a new Timer is added, the currently active timer (if one of the timers is running and has not been paused when the Add Timer button is clicked) will automatically be saved and paused and the new timer will begin running.
The current (or previously last active) timer will always be at the top of the Timers list.