Create Bank Import (CSV)
If your banking platform provides for download of bank statements in CSV format, download the statement(s) you require. When saving the downloaded file ensure that the account number is reflected in the file name.
Some banking platforms allow for multiple account statements to be downloaded in one download and may create a zip file that contains individual files for each of the accounts that were selected.
So long as the names of the individual files in the zip file identify the bank account number, the zip file itself can be uploaded, alternately each file in the zip file can be individually selected and/or dropped using the bank import content loader.
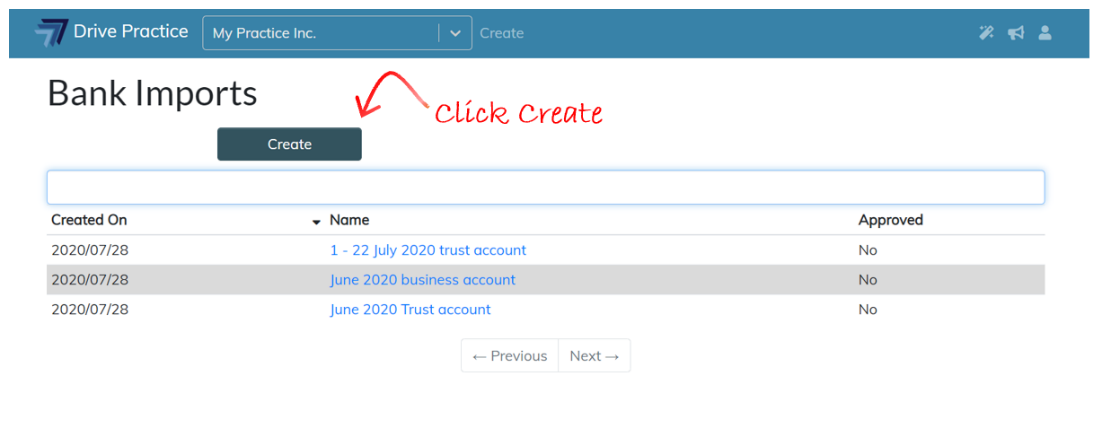
To create a new import, navigate to the Bank Imports list screen and click on the Create button.
The Create Bank Import page will open with three fields to complete.
-
Name
Enter a name for the import that will provide for easy searching and access after importing, for example “Trust and Bus A/c Jul 2019”.
-
Reference Prefix
Enter a prefix for the reference that will be given to each entry on the bank statement, for example “0719/“. Each entry will also be allocated a number that will be added at the back of the prefix, depending on the number of entries imported for a bank account. For example, if there were more than 10 entries but less than 100 for a bank account in the import, the first entry will be referenced 0719/01. If there are more than 100 but less than 1000, the first entry will be referenced 0719/001.
-
Padding Character
The padding character is used to fill the reference number as described above and defaults to 0 but any character could be used.
To upload bank statements to import, navigate, using Windows Explorer, to the folder where your downloaded files are, click on a file or select multiple files and using your mouse drag them to the content loader on the Create Bank Import web page.
You can also click on the content loader to open Windows Explorer to navigate to and select the downloaded file(s).

Once a file (or files) has been selected, a CSV file section will open for each file uploaded.
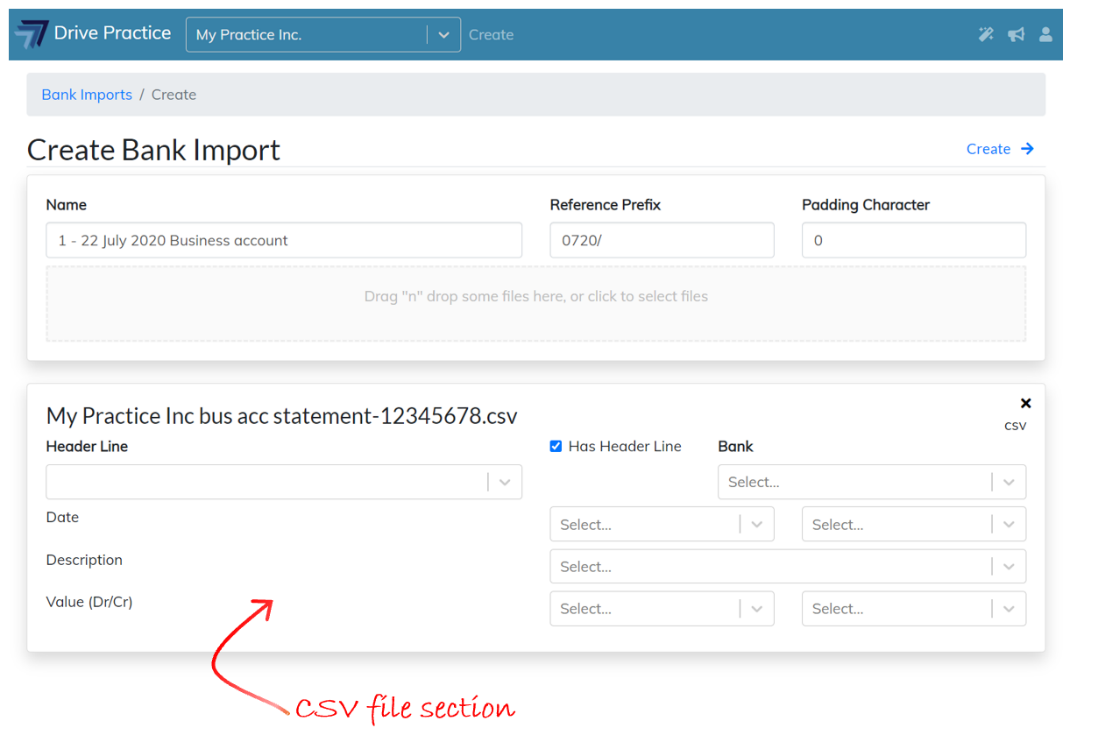
The columns in the CSV file must be mapped in the CSV file section. Depending on the bank and/or the banking platform, CSV files may or may not have a header line.
If the CSV file includes a column header line the mapping will be done automatically once the header line is set.
To set the header line, click on the Header Line field to open the drop-down list. Select the line that displays column header names. The fields will populate once the header line is selected and the field mappings will display.
Ensure that the “Has Header Line” check box is checked.
If the CSV file does not include a column header line the mapping must be set by selecting a transaction line.
Click in the Header Line field to open the drop-down list. Select a transaction line.
Ensure that the “Has Header Line” check box is not checked.
![]()
Once the transaction line is selected complete the mapping by populating the Bank account, Date and Description fields.
To select a bank, click on the Bank field to open the dropdown list and select the bank account that the import is for, or type a few letters of the bank account name to filter the list and select the bank account with the up and down arrow keys and press enter.
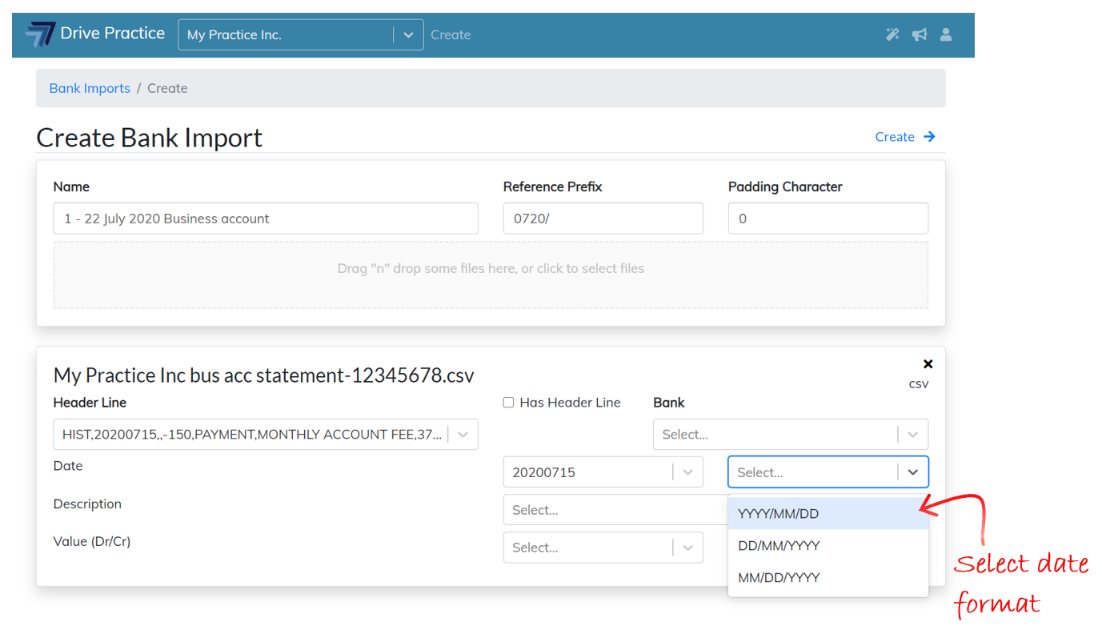
Click on the first field to the right of the “Transaction Date” field and select the date from the transaction line dropdown list.
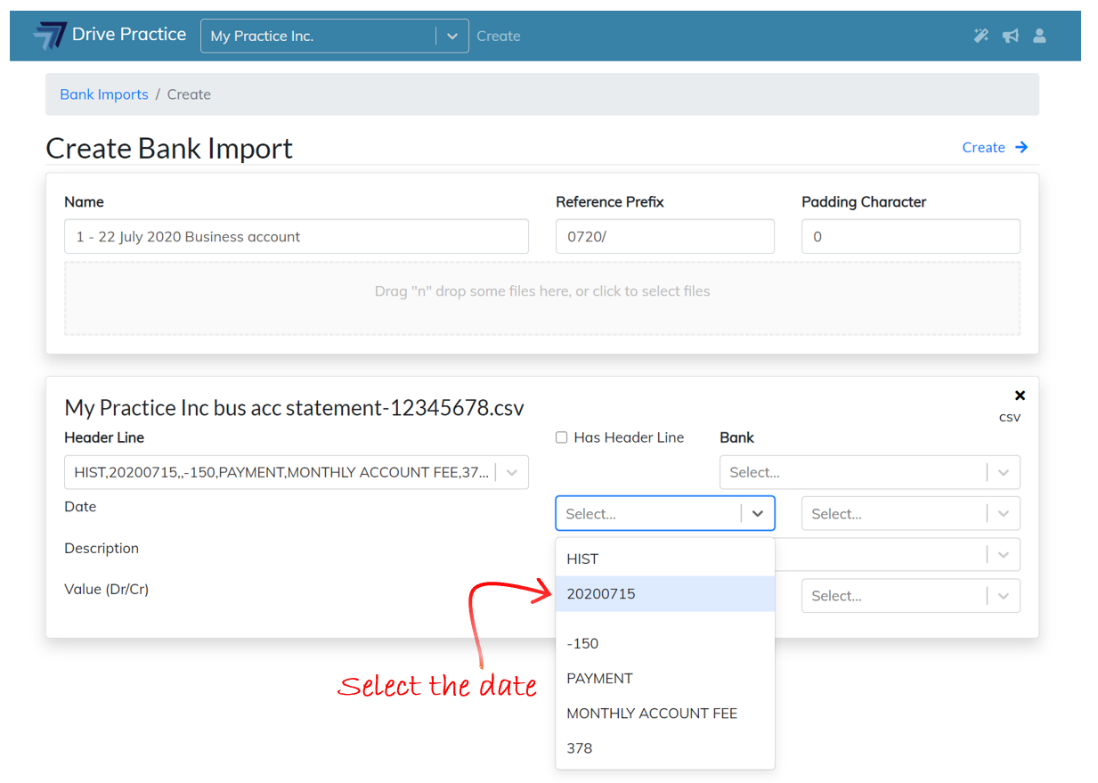
Once the date is selected, click on the second field to the right of the “Date” field and select the date format that corresponds with the selected date information line.
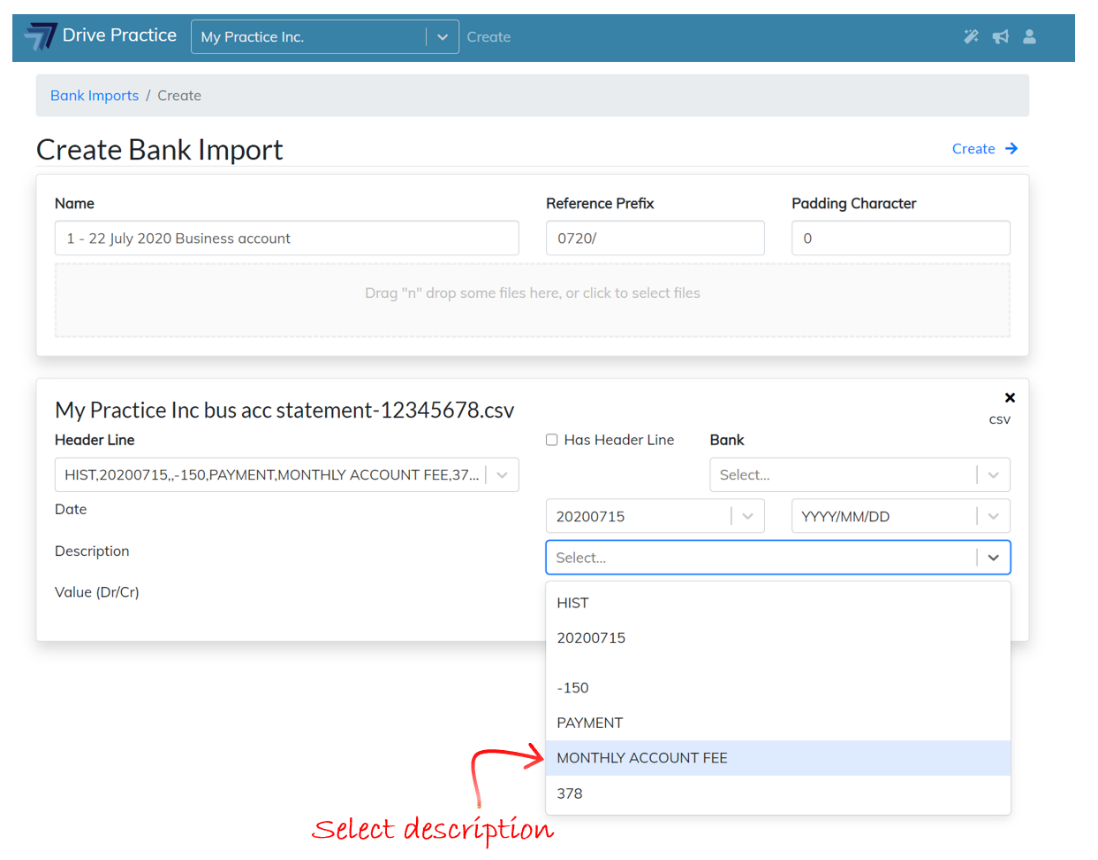
Click on the field to the right of the “Description” field and select the description from the transaction line dropdown list.
Some CSV files contain two description columns, one that contains a bank generated transaction description and a second one that contains the description used by the person who created the transaction.
Select the description that was used by the person who created the transaction as this will always provide more information to identify the nature of the transaction and therefore how/where it should be allocated.
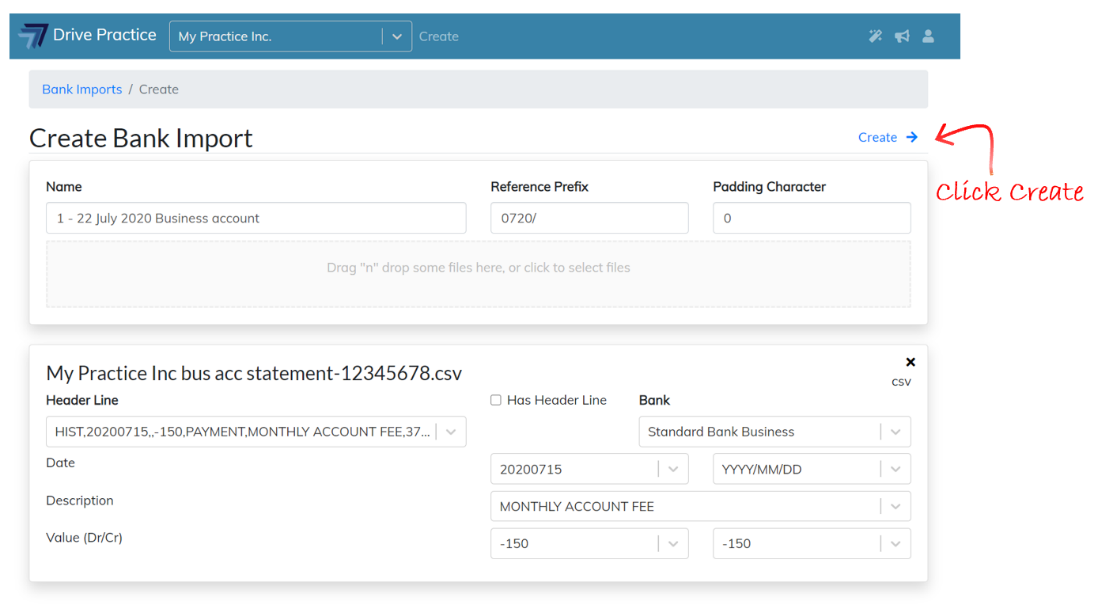
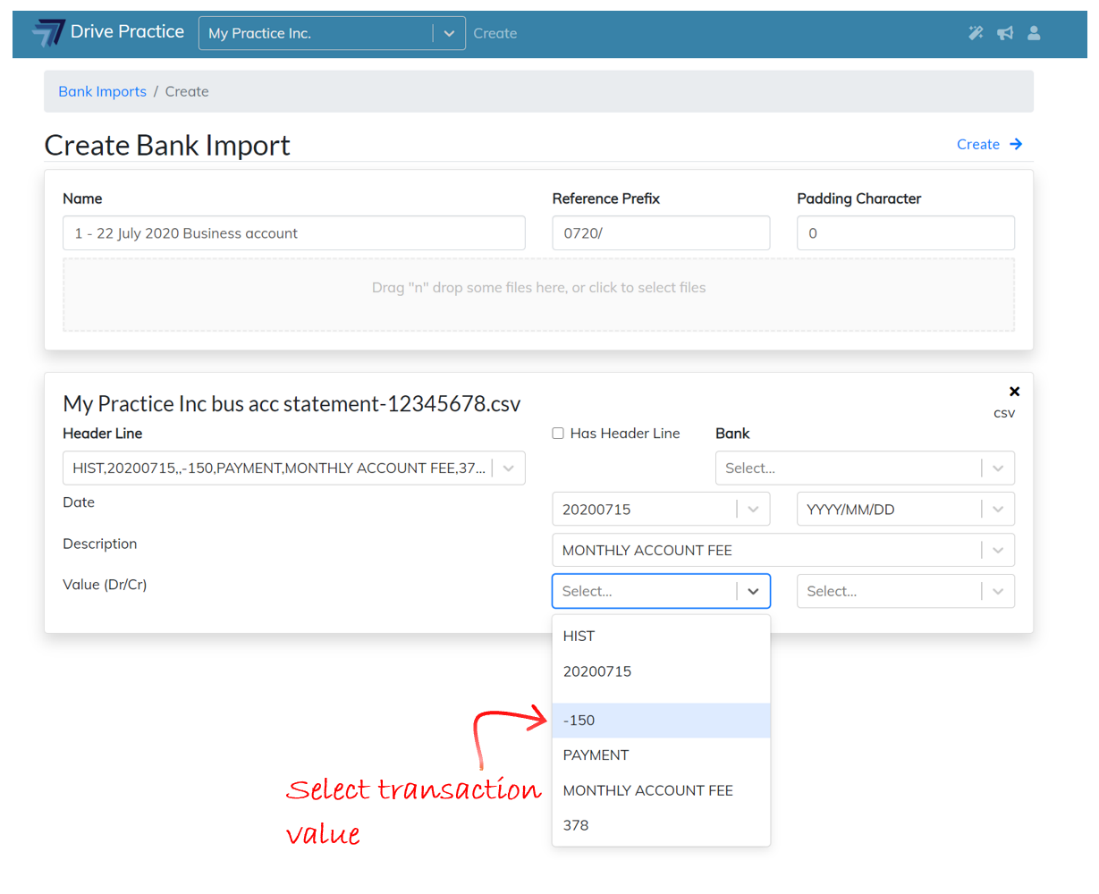
Value (Dr/Cr):
Click on the first field to the right of the “Value (Dr/Cr)” field to open the transaction line dropdown list. Select the transaction value from the information list to complete the Dr amount field.
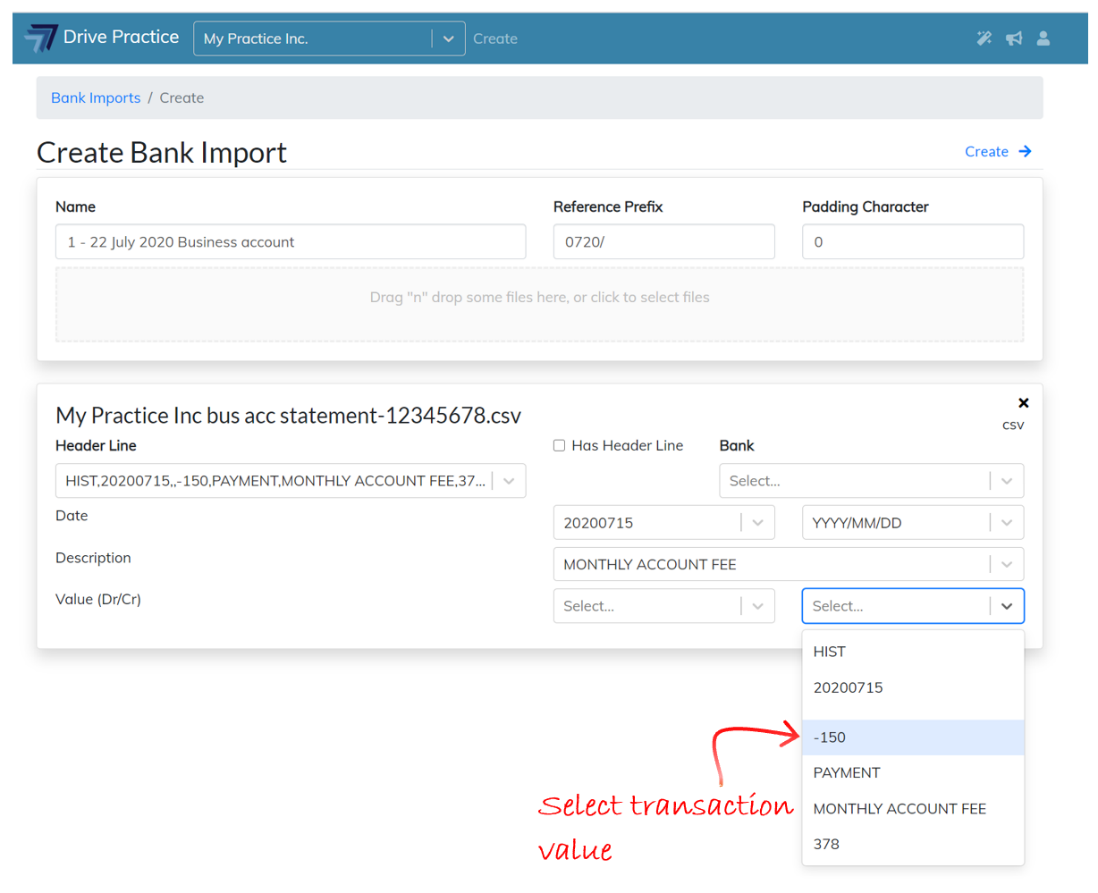
Click on the second field to the right of the “Value (Dr/Cr)” to open the drop-down list. Select the transaction value again from the information list to complete the Cr amount field.
Once these fields are completed, click on the Create button.