Create Client Invoice
Using Client Invoices List Screen
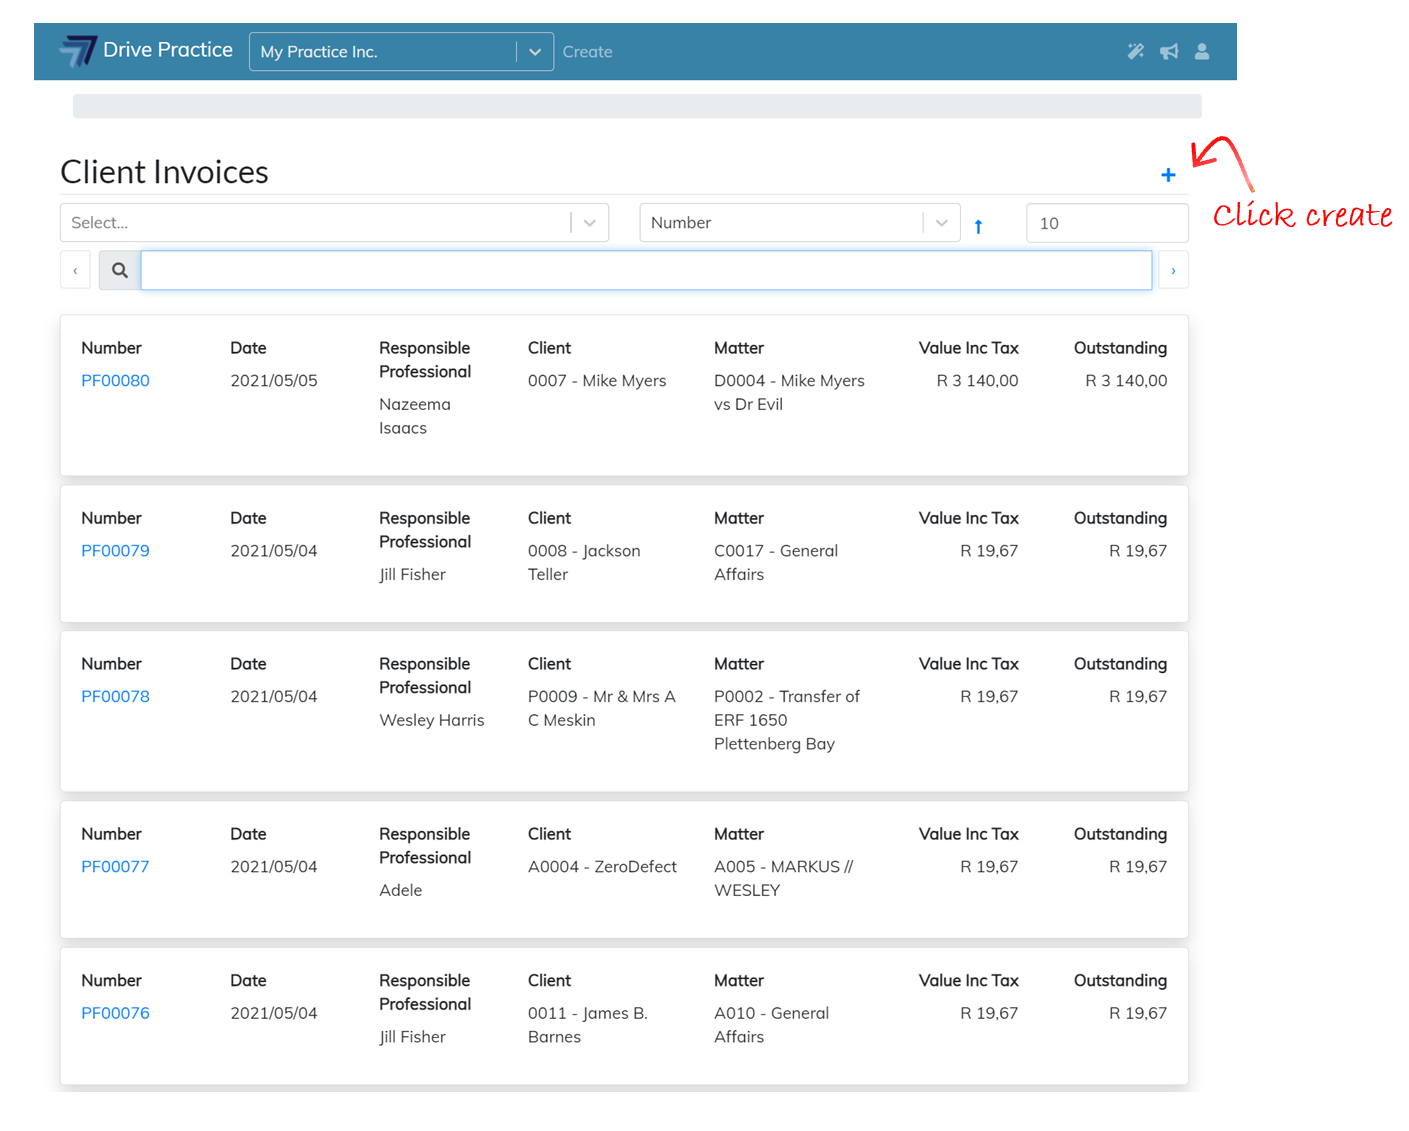
To create a client invoice, navigate to the Client Invoices list screen as described in the Client Invoices List Screen section above and click on the Create button.
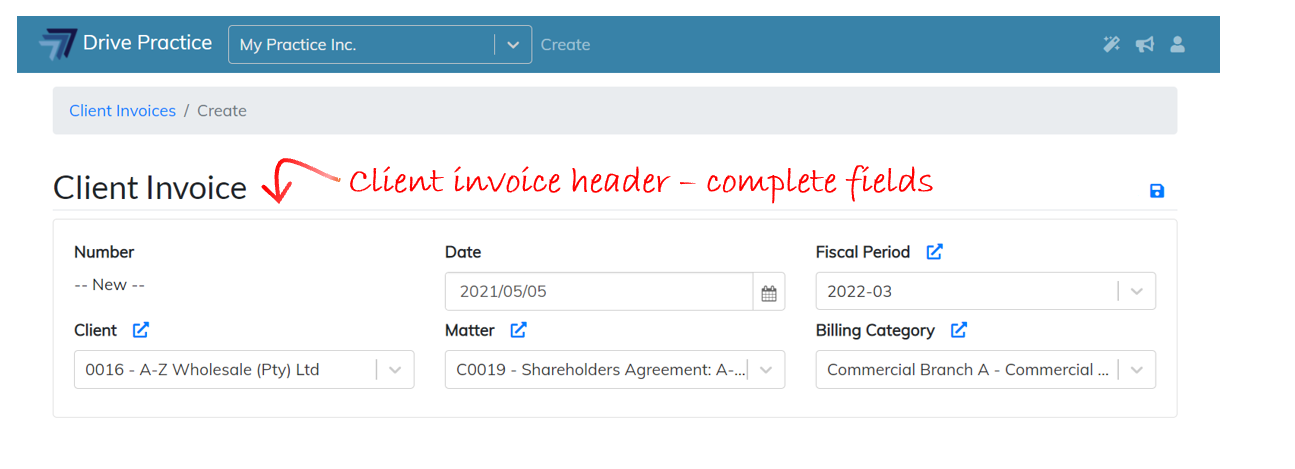
The Client Invoice screen will open with the Client Invoice header fields to complete.
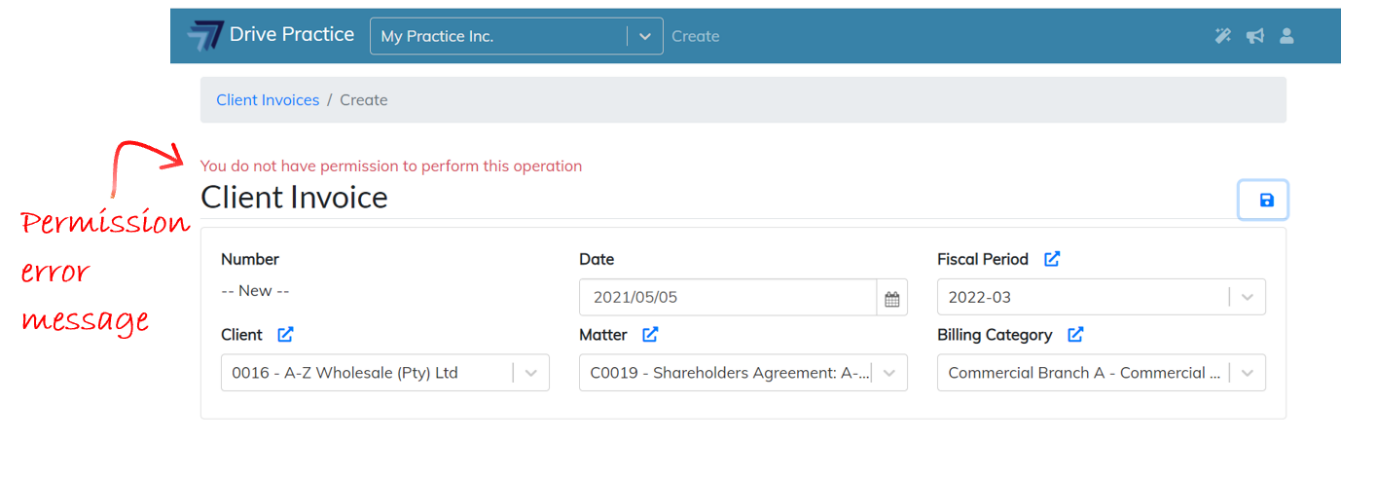
If the Manage Client Invoice right has not be assigned to the user attempting to create an invoice from the Client Invoice list screen the user will be given an error message that the user does not have permission to perform this operation when trying to save the new invoice. The user right to Manage Client Invoices is described in the User Rights for Client Invoices section of this document.
The Client Invoice header fields are described below.
-
Number
This will become the invoice number and is set to “– New –” until the new header is saved. When the header is saved, the invoice number will be set to the next pro-forma invoice number in either the default sequence or the applicable sequence for the Billing Category where the system has been configured to have pro-forma invoice sequences by Billing Category.
-
Date
The date will default to today and can be set to whatever the desired date is for the invoice. Either manually change the date or select the date by clicking on the date picker icon. If there are unbilled activity entries for the matter that is going to be billed, only unbilled activities dated on or before the date selected will be added to the invoice when the header is saved.
-
Fiscal Period
The Fiscal Period will default to the period within which the Date falls. The Fiscal Period can be changed to another period if required.
-
Client
Enter either the client number or name to filter the dropdown list. Click on a client name in the list or use the up and down arrows and tab on a client name to select the client from the list.
-
Matter
If the Client has been selected, the Matter field will be filtered to only list the matters that belong to the Client selected. Click on a matter in the list or use the up and down arrows and tab on a matter to select the matter from the list.
If the Client field has not been set, then enter either the matter number or name to filter the dropdown list. Click on a matter in the list or use the up and down arrows and tab on a client name to select the matter from the list.
-
Billing Category
The Billing Category will default from the Matter selected. To change the Billing Category, select a different Billing Category from the dropdown list by either clicking on a Billing Category in the list or using the up and down arrows and pressing enter or tab to select the Billing Category.
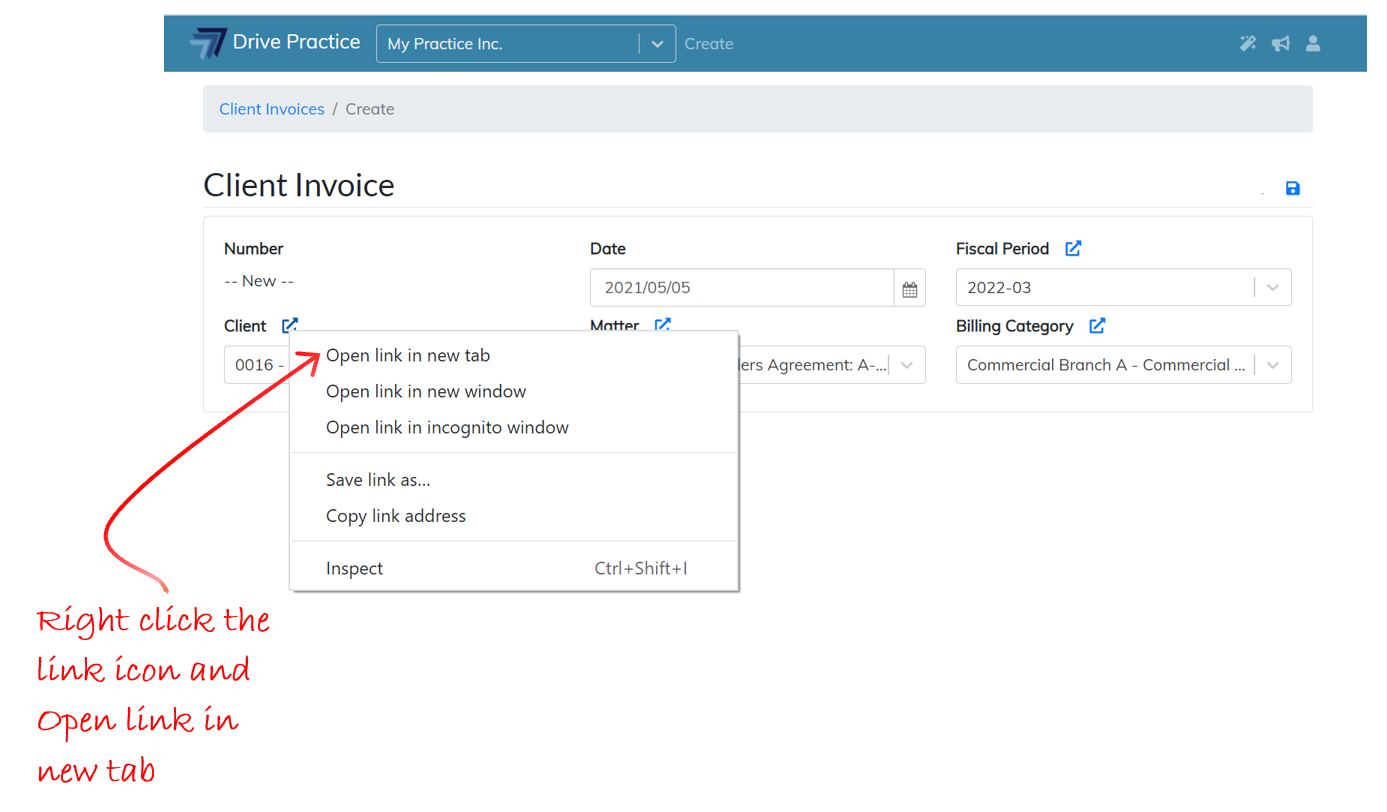
When the Client, Matter and Billing Category fields have been set, they will have a link icon above the field.
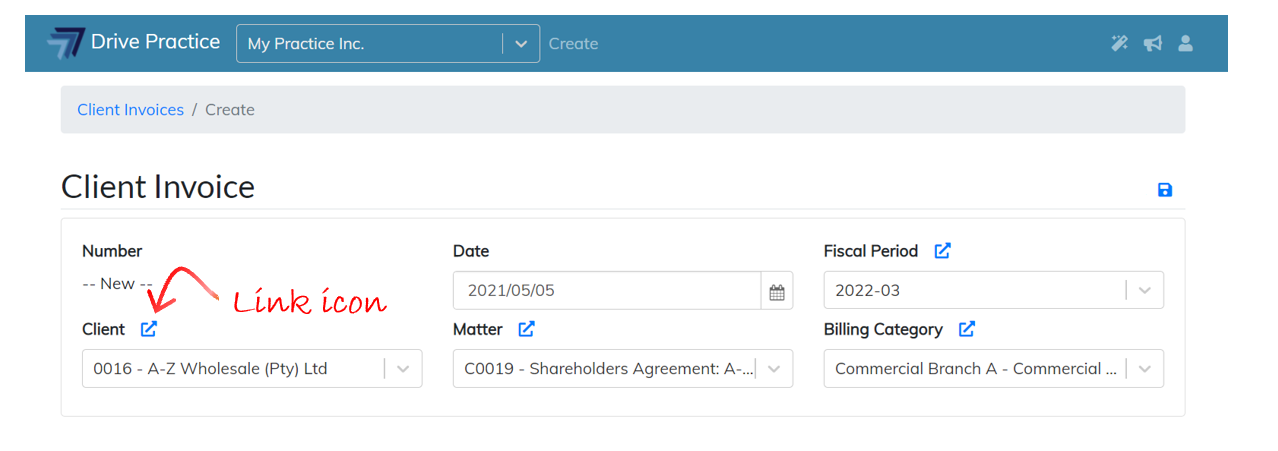
The link icon can be used to navigate to the selected Client, Matter or Billing Category to view details of the selection. Clicking on a link icon will open the item’s record, navigating away from the invoice header screen. All data entered on the header screen will therefore be lost when navigating back to the header screen. To not lose the data entered, you can right click on the link icon and choose to open the record in a new tab.
When the header fields have been set, click on the Save button to save the header and create the invoice or use the Ctrl-Enter shortcut key to save the header and create the invoice.

Using Bill Now on Client
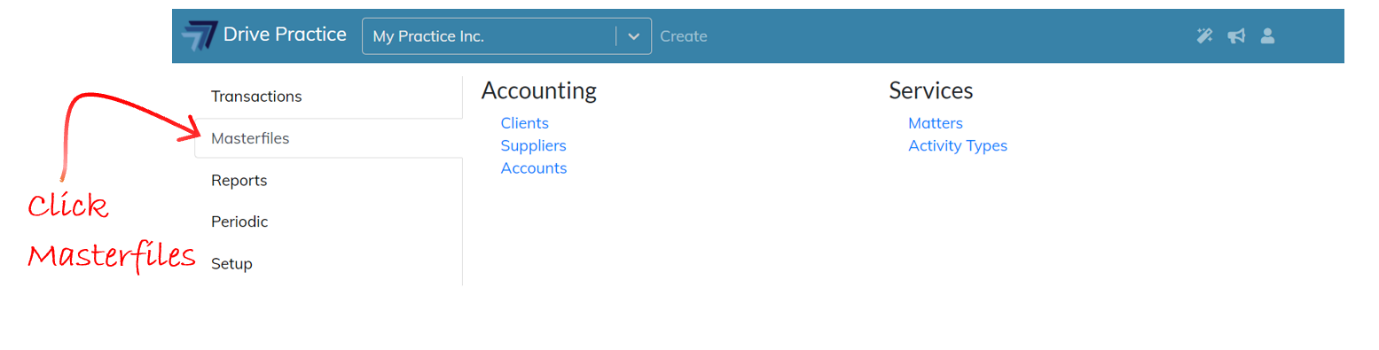
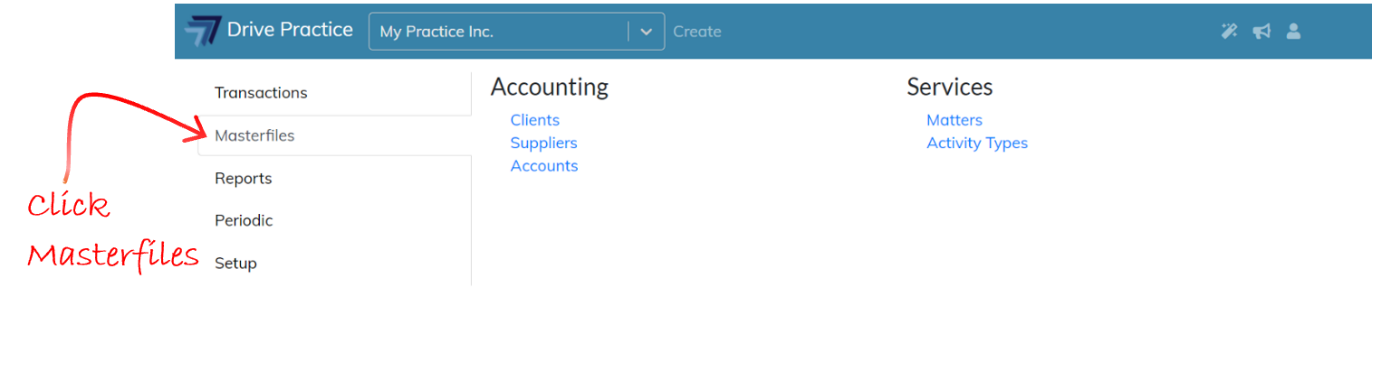
To create a Client Invoice using the Bill Now button on a Client record, click on the Drive Practice logo to get to the menu and click on Masterfiles to show the Masterfiles menu.
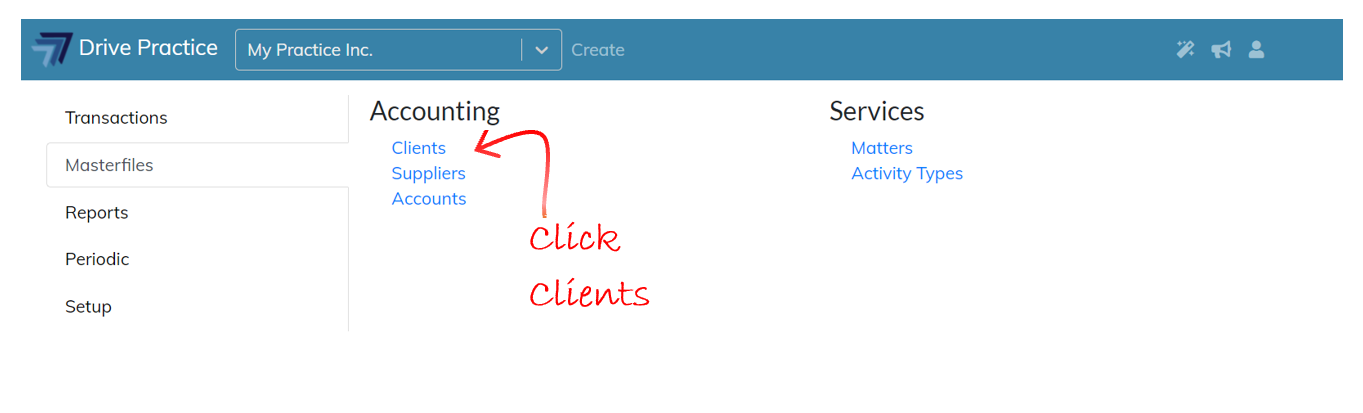
Click on Clients to navigate to the Clients list screen.
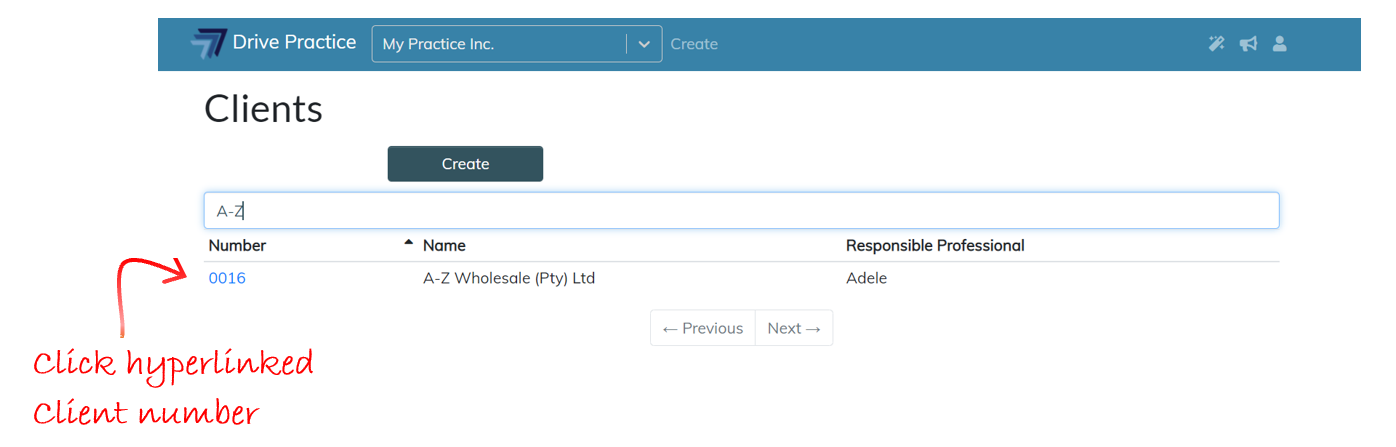
In the search bar, type in some characters of either the Client’s name or number to filter the list and click on the hyperlinked client number to open the Client record.
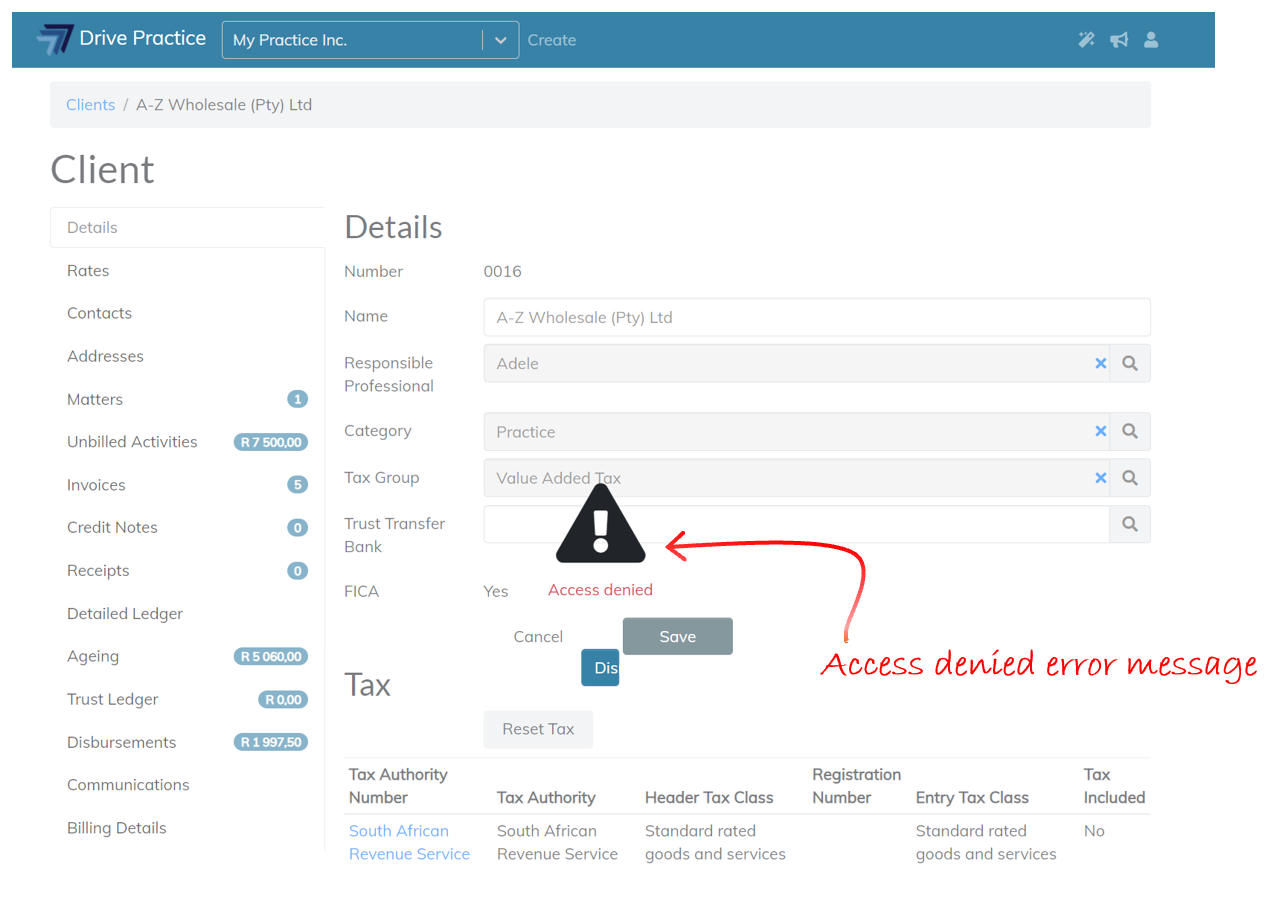
If the Manage Clients right has not be assigned to the user, the user will only be able to view a Client record. No editing will be allowed. If the user tries to edit any client information an Access Denied error message will appear. The user right to Manage Clients is described in the User Rights for Client Invoices section of this document.
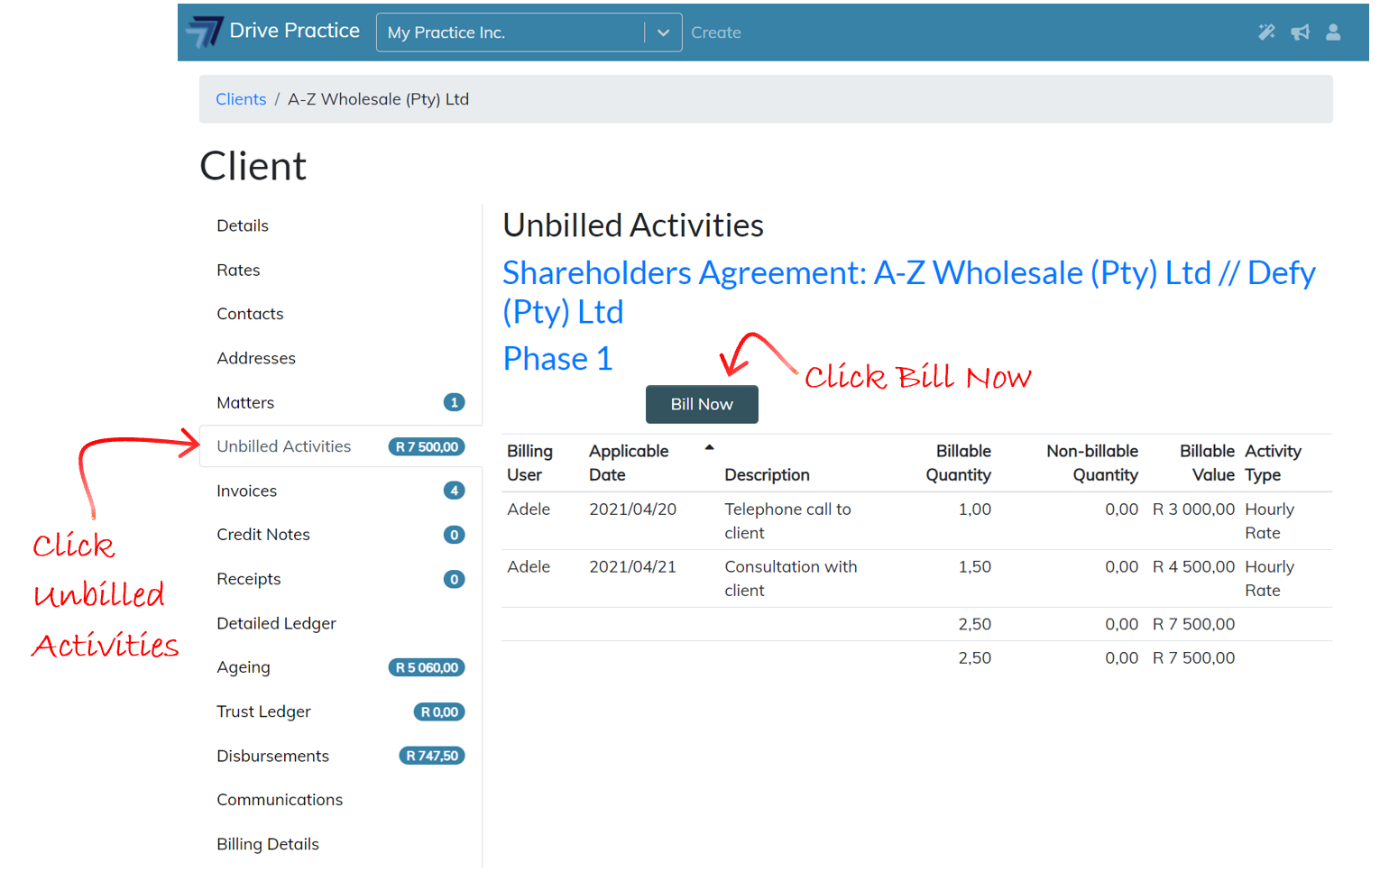
Click on the Unbilled Activities tab and click on the Bill Now button for the Client’s matter for which you want to create an invoice.
If the Manage Client Invoice right has not be assigned to the user attempting to create an invoice from the Client screen the user will be given a permission error message when attempting to save a new invoice. The user right to Manage Client Invoices is described in the User Rights for Client Invoices section of this document.

If the user has the Manage Client Invoice right, the user will be able to save the new Client Invoice after completing the fields in the Client Invoice header being the Client, Matter and Billing Category fields.
Follow the process described in the Using Client Invoices List Screen section to save the header and create the invoice.
From Bill on Matter
To create a Client Invoice from the Bill button on a Matter, click on the Drive Practice logo to get to the menu and click on Masterfiles to show the Masterfiles menu.
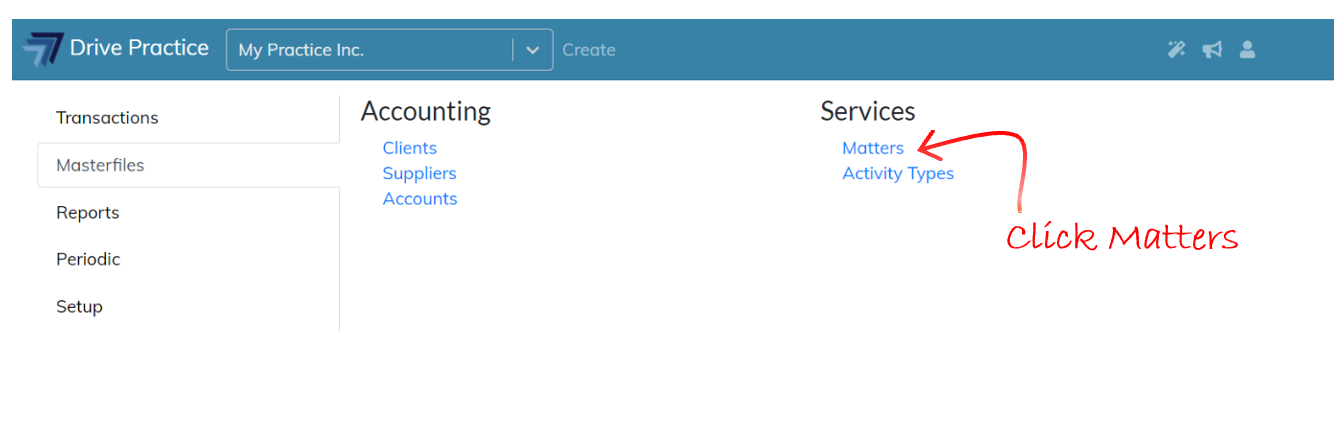
Click on Matters to navigate to the Matters list screen.
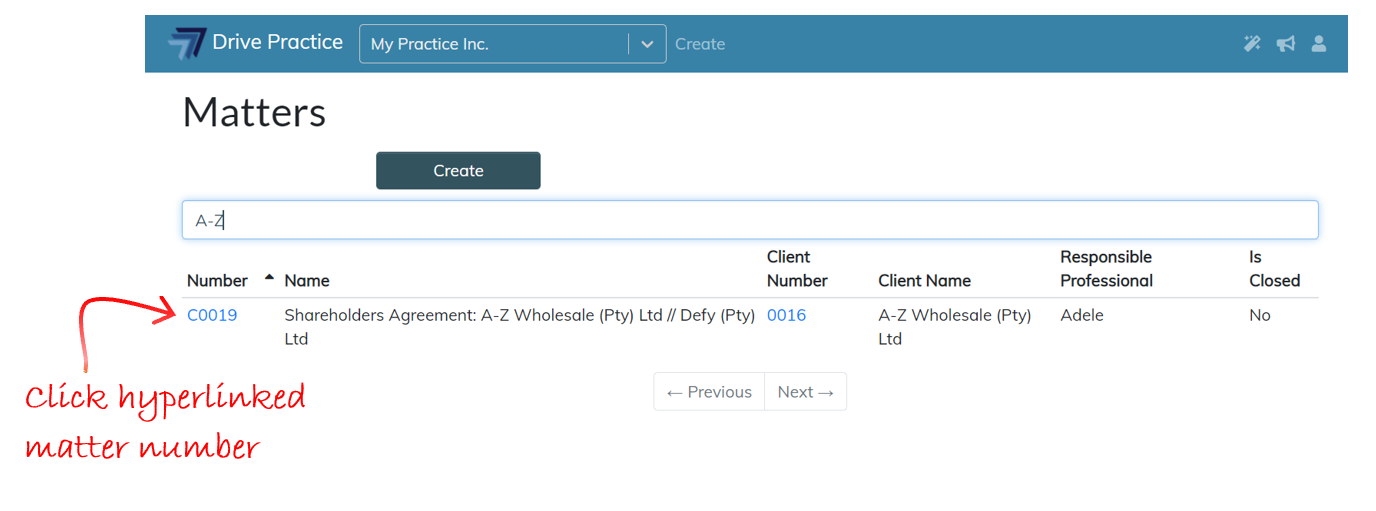
In the search bar, type in some characters of either a Matter or Client name or number to filter the list and click on the hyperlinked Matter number to open the Matter record.
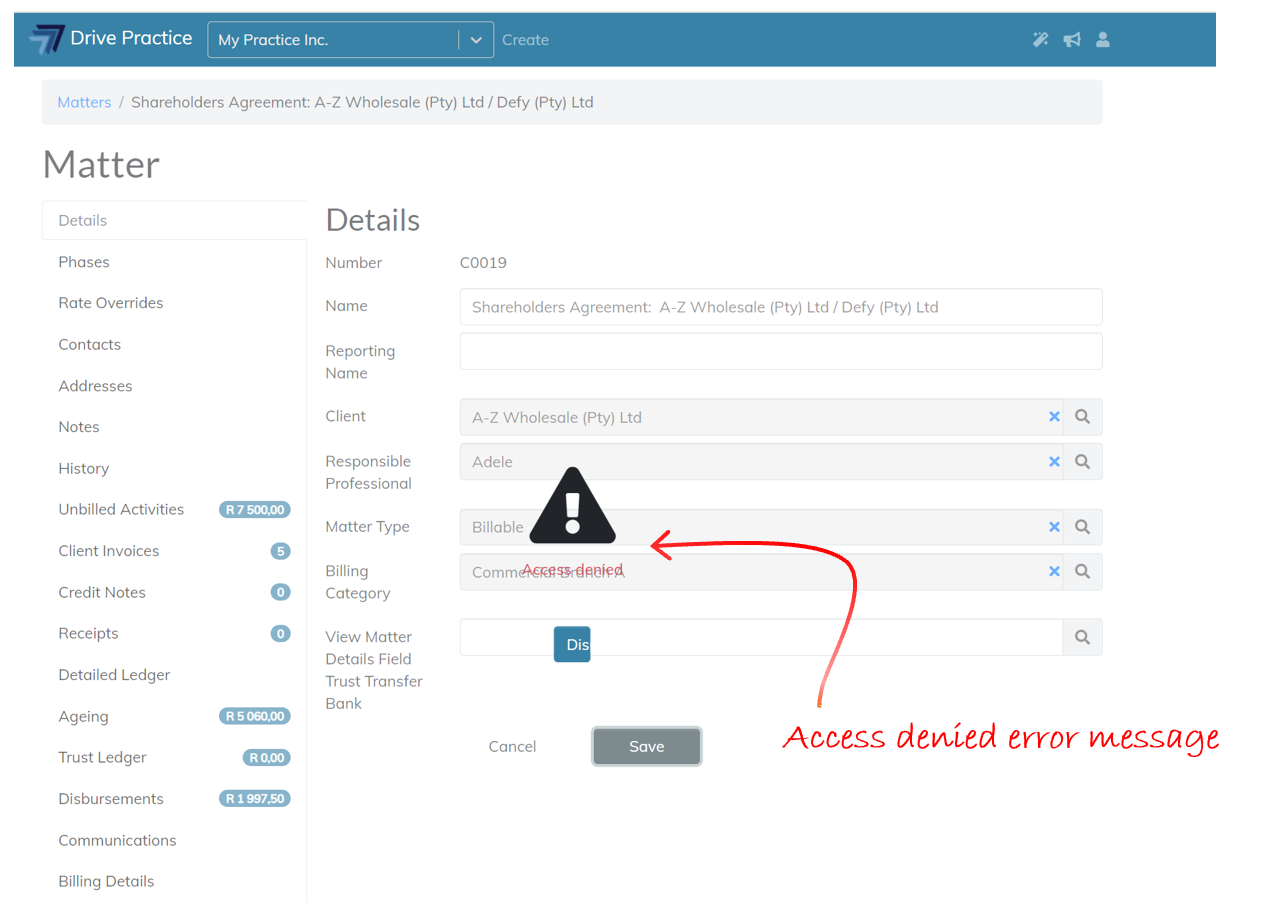
If the Manage Matters right has not be assigned to the user, the user will only be able to view a matter record. No editing will be allowed. If the user tries to edit any matter information an Access Denied error message will appear. The user right to Manage Matters and how to assign it is described in the User Rights for Client Invoices section of this document.
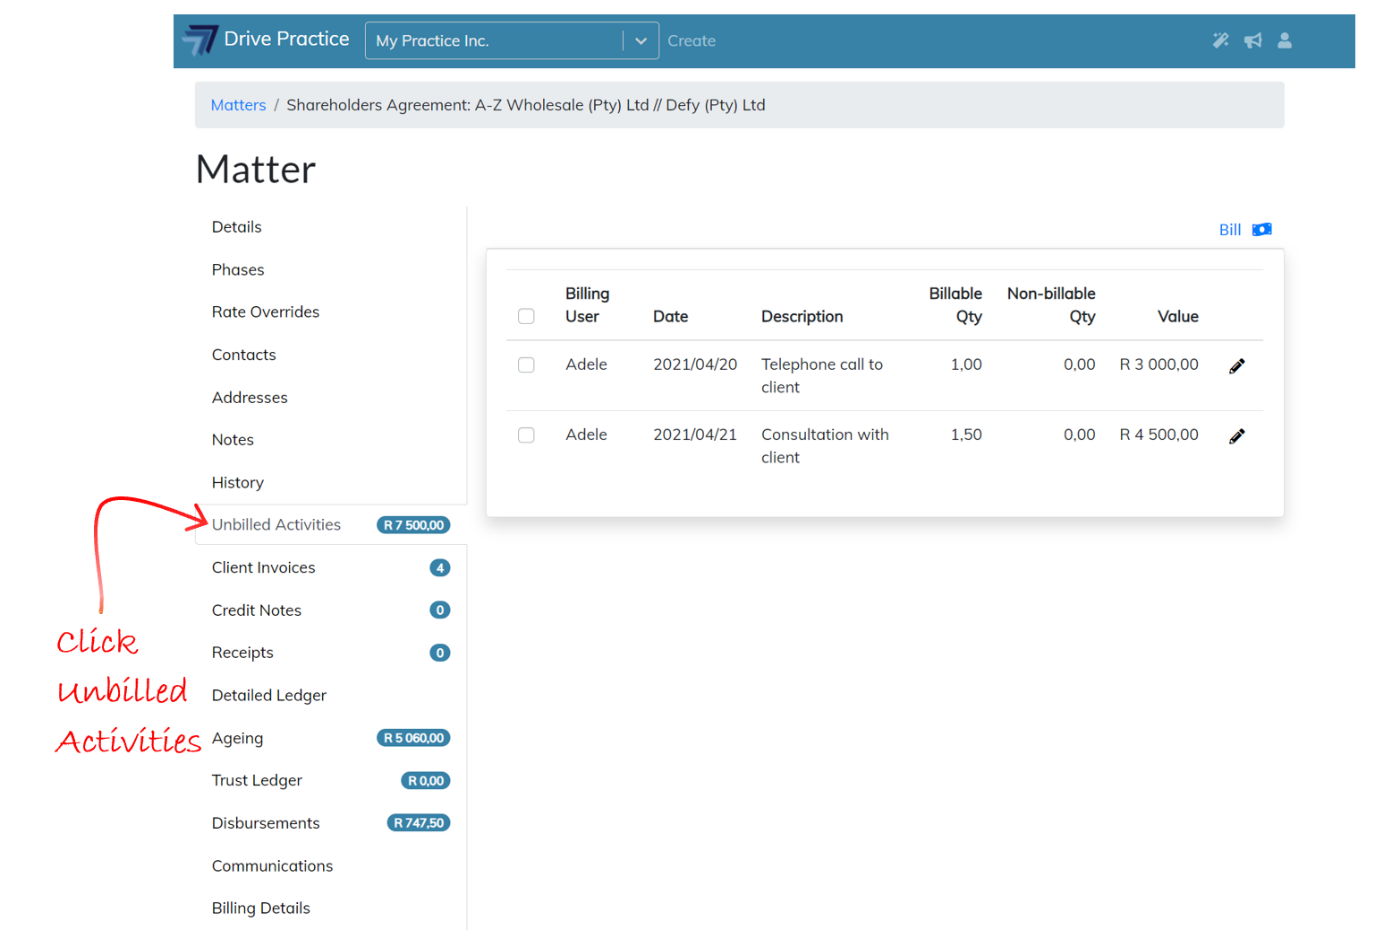
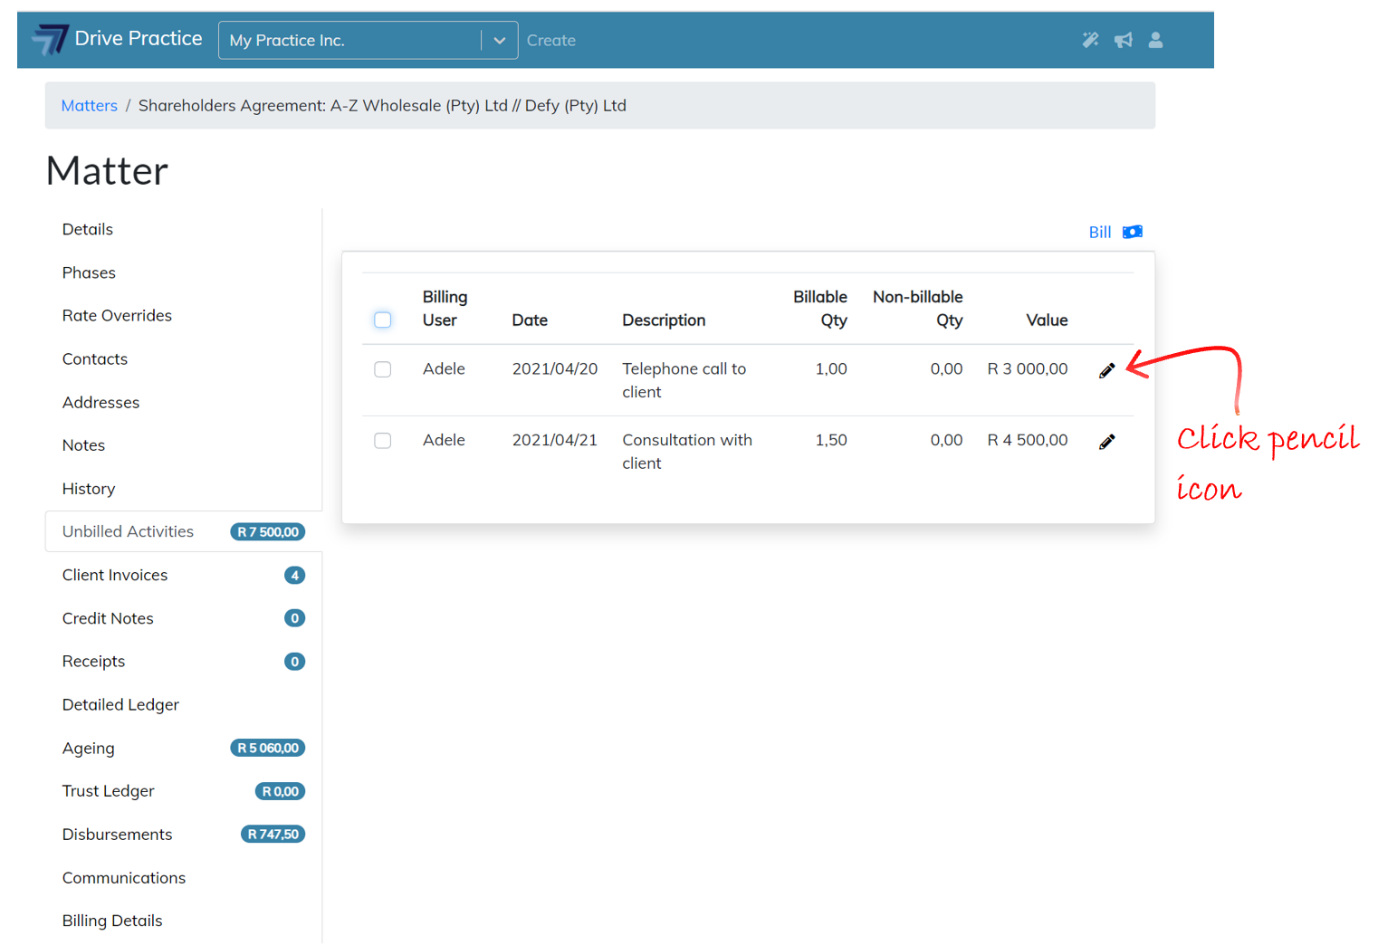
On the Matter screen, click on the Unbilled Activities tab.
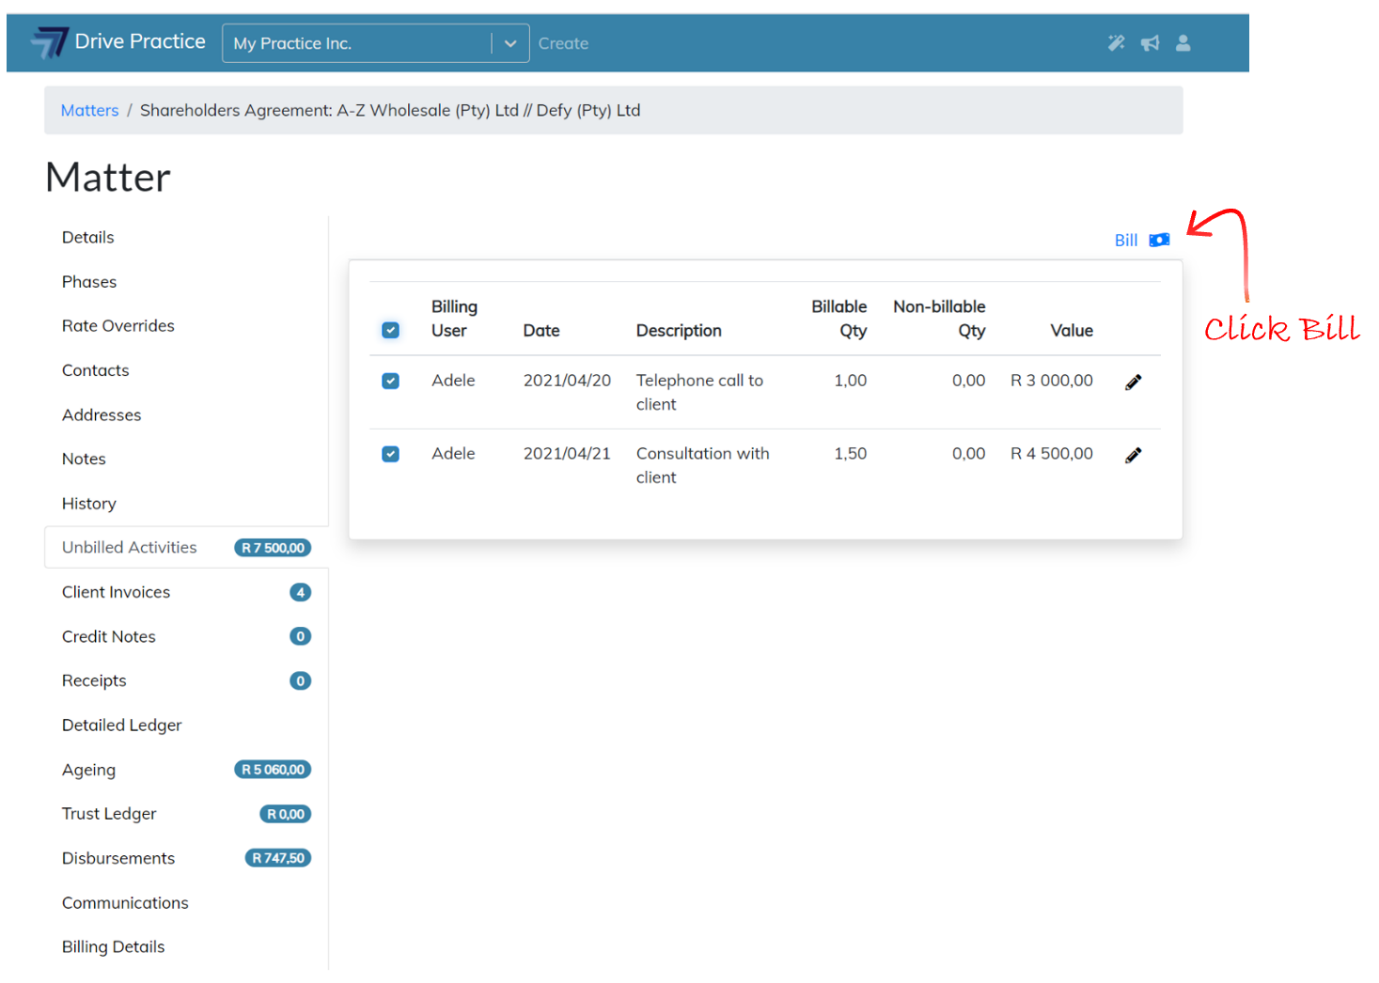
On the left of the list of unbilled activities are check boxes to select and unselect activities to be included in the invoice. Select the activities to be included on the invoice by clicking on the checkbox next to an activity entry. The check box to the left of the column headings selects or deselects all the entries.
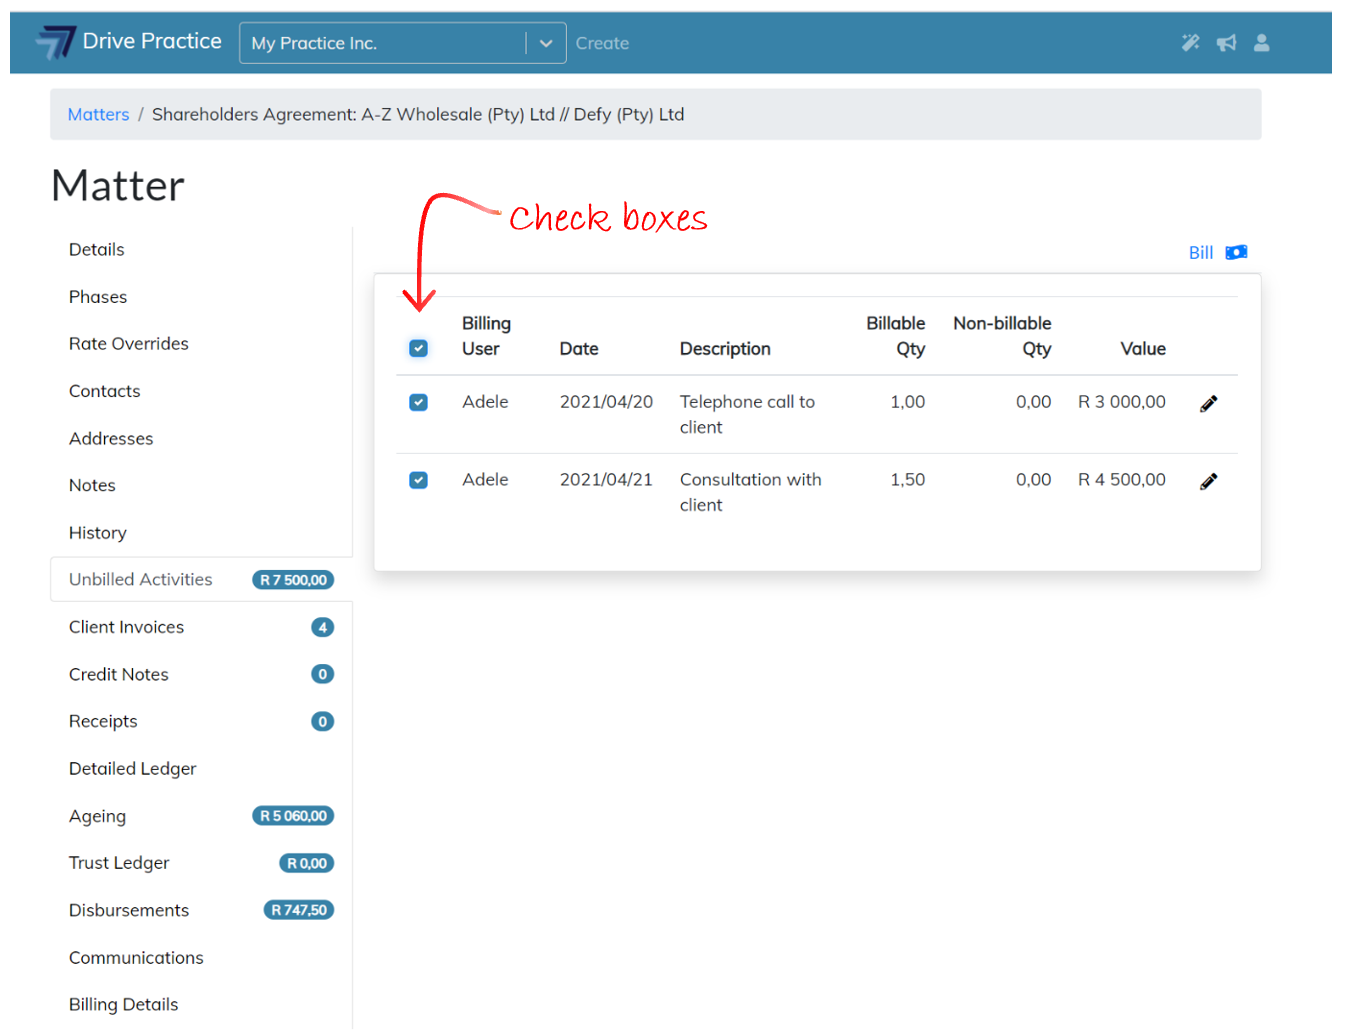
On the right of each entry, is a pencil icon. To edit an entry before billing it, click on the pencil icon and adjust anyone of the fields in the entry.
When editing and selecting entries is complete, click on the Bill button.
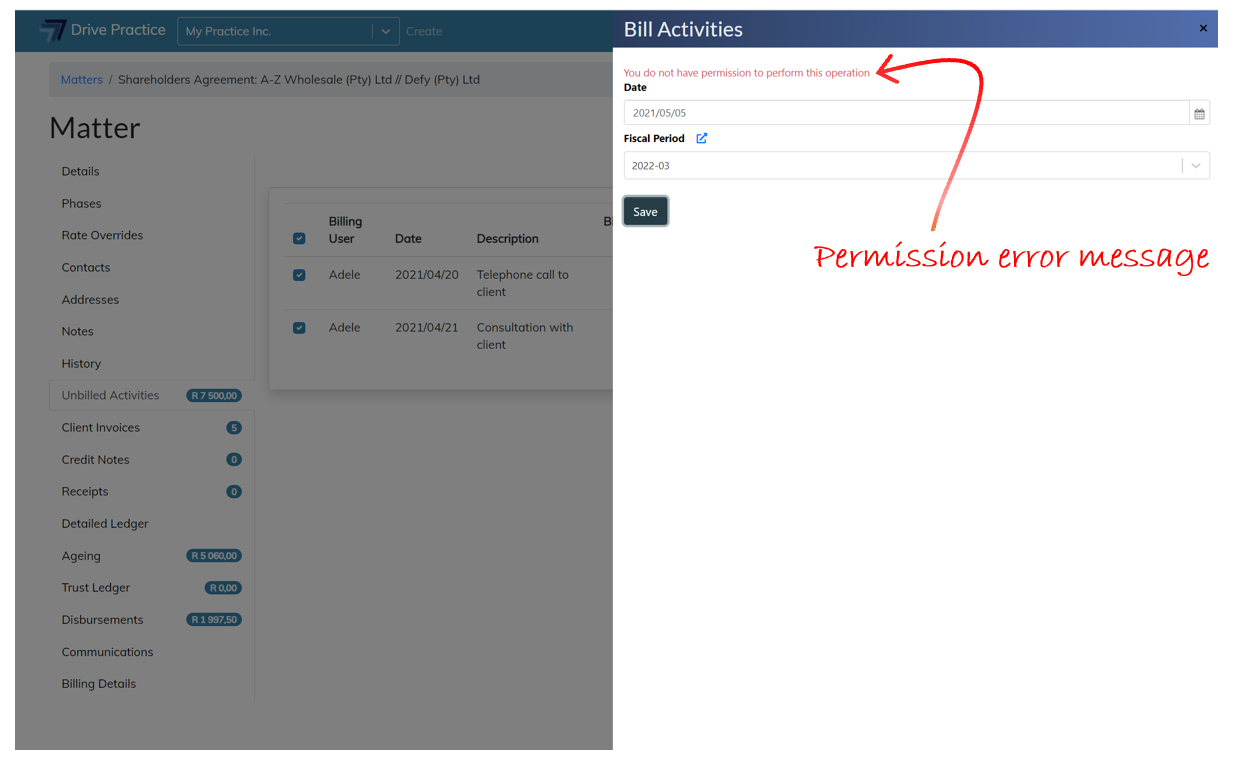
If the Manage Client Invoices right has not be assigned to the user, the user will not be able to save a new invoice and the user will be given a Permission error message. The user right to Manage Client Invoices and how to assign it is described in the User Rights for Client Invoices section of this document.
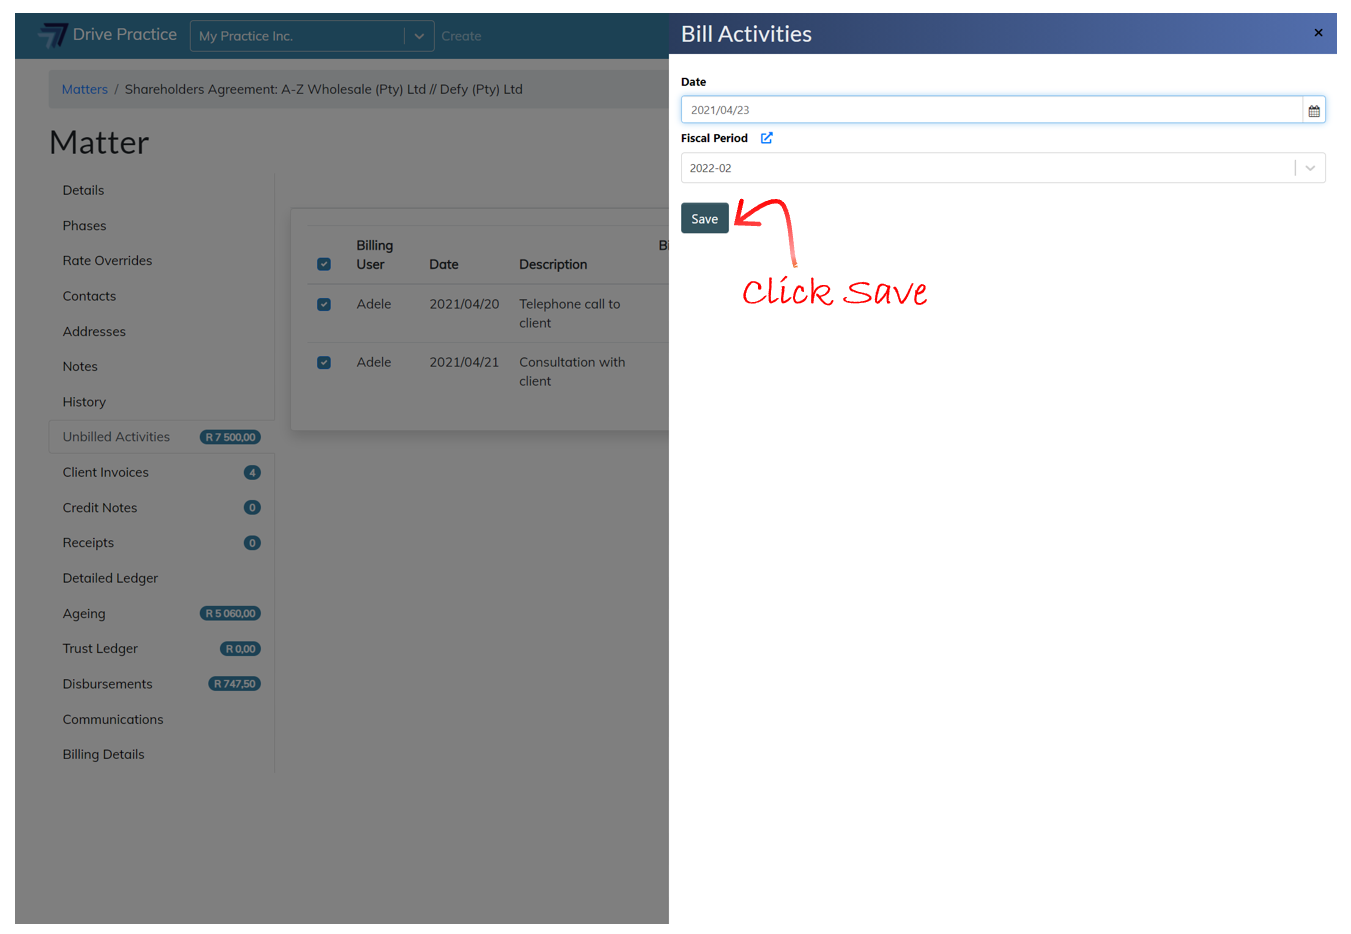
It the user has the Manage Client Invoices right allowed the user will be able to save the Client invoice in the Bill Activities side panel opened on the right with the current Date and its correlating Fiscal Period pre-populated. Amend the Date and/or the Fiscal Period if required and click the Save button to create the Client Invoice.
The invoice header screen will open with the additional header fields to be completed.
Follow the process described in the Using Client Invoices List Screen section to save the header and create the invoice.